First off, what most of us commonly call Pigeon is actually a preparation for the full posture known as Eka Pada Rajakapotasana, meaning One-Legged King Pigeon Pose. In the full pose, the back leg is bent and both hands reach up and over the shoulders to grasp the back foot. The spine comes into deep extension to allow the back foot to move towards the crown of the head. The full expression requires not only open hips, but open shoulders, deep back-bending, and balance, making it quite an advanced posture.
The version that we most often encounter in class isolates our attention on the hips because the back leg is kept in an extended position and the torso is often draped over the front leg to help gravity do its thing. But even that can be too uncomfortable at first, so there are gentler options available. We’re going to begin with the most accessible version and work our way up to the full posture.
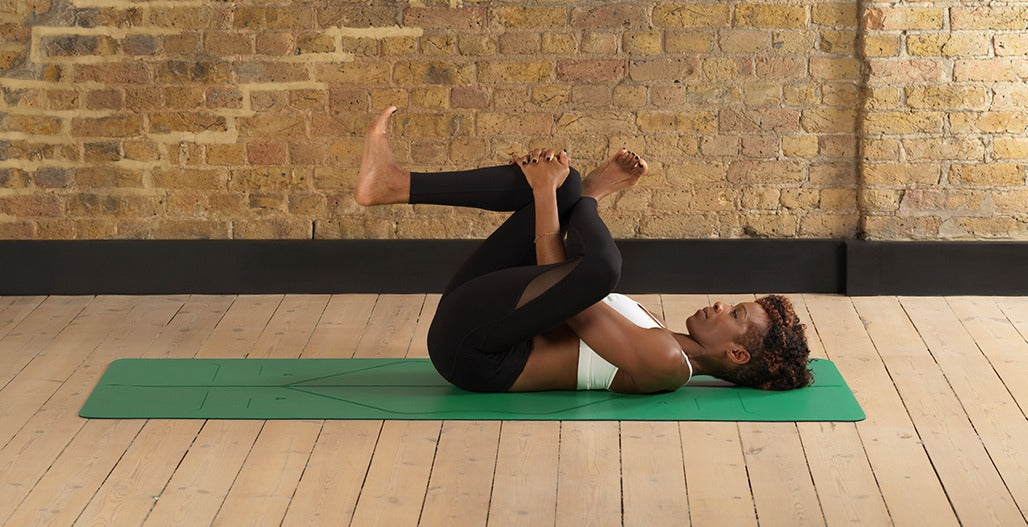
Sucirandrasana (Eye of the Needle Pose)
You may think this doesn’t look much like a Pigeon but it offers much the same stretch in a way that allows for a lot more user control. So let’s call it Supine Pigeon. It’s a great place to start if you have super tight hips.
Instructions
1. Lie on your back with both knees bent toward the ceiling and the soles of your feet flat on the floor.
2. Place your right ankle on the top of your left thigh with the right knee pointing out to the right.
3. Lift your left foot from the floor. Keep both feet flexed.
4. Reach your right hand through your legs and your left hand around the left side to clasp your hands behind your right thigh.
5. Draw your left thigh in towards your chest. Your right knee continues to move away from your chest.
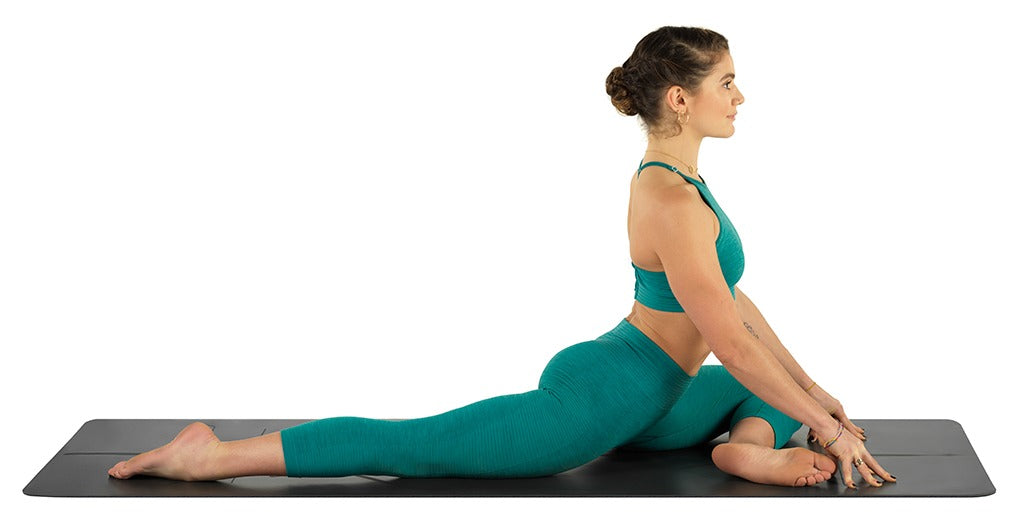
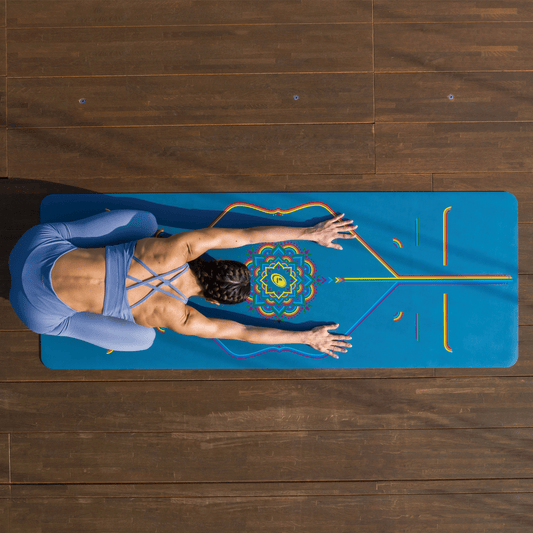
Pigeon Prep (Eka Pada Rajakapotasana Prep)
This is what most of us just call Pigeon. When upright, try to keep your weight from shifting off to one side. To add a little pressure to your front leg and intensify the stretch, take a forward fold.
Instructions:
1. From Downward Facing Dog, step your right foot forward, landing your right knee just to the outside of your right wrist and the top of your right foot behind your left wrist. The front side of your left leg will come to the floor.
2. Your left foot might come right behind the left wrist so that your shin is pretty parallel to the front edge of your mat but it’s more likely that the foot will feel comfortable somewhere between your left wrist and your left hip point. Wherever it lands is fine. Moving the foot closer to the wrist can cause discomfort in your right knee so don’t put it in a position that’s painful.
3. Once you have your front leg situated, tuck your left toes under and scoot your left knee a little further back on your mat. Then release the top of your left foot to the floor with the toes pointing straight back (watch that it doesn’t sickle inwards!).
4. Now, because we think that one of the goals of this posture is to get the right buttock down to the floor, there is a strong tendency to accomplish this by shifting your weight over to the right side. Don’t do this!
Yes, the buttock will be on the floor but you will have lost the entire integrity of the posture. Instead, makes sure that both hip points continue to face the front of your mat like two car headlights. This may mean that there's a big gap between your right buttock and the floor and that is perfectly ok. Now would be a good time to use a prop like a folded blanket under that side of your butt for support.
5. If this feels like a lot, stay upright. Otherwise, you can start to come forward over your right leg any amount. You may be able to drape your torso over your front leg and come down to your elbows or eventually bring your forehead all the way to the mat.
6. Once you get to a place that is comfortably edgy (meaning you feel like something is happening but it’s not going to kill you) stay for five to ten breaths or even more if you like. Pigeon is one of those poses where release can continue to happen when you stay put, especially since you’re using gravity to help you along.
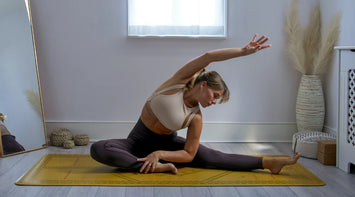
Mermaid Pose
Mermaid takes you a step closer to Full Pigeon by introducing a backbend, shoulder stretch, and quad stretch. That said, it’s still a lot more accessible than the full pose and can be made even more so with the help of a strap.
Instructions:
1. From Pigeon Prep (above), bend your left knee and bring your left heel toward your left buttock.
2. Reach your left hand behind you and take hold of the inside of your left foot.
3. At this point, things can become a little tippy so make sure that you have padding under the right buttock if necessary so that you don’t start falling over to the right side. Another alternative is to firm both thighs and press strongly down through both knees into the floor. This has the effect of bringing your pelvis a bit higher but stabilising it so that you don’t collapse to one side.
4. If you want to go further, slide your left foot into the crook of your left elbow. Keep both feet active.
5. To complete the posture, reach your right arm up to the ceiling. Bend your right elbow so that your right hand drops behind your back and you are able to clasp your right and left hands together. If they don’t meet, you can use a strap between them instead.
6. Press the back of your head into your right arm and open your chest toward the front of the room.
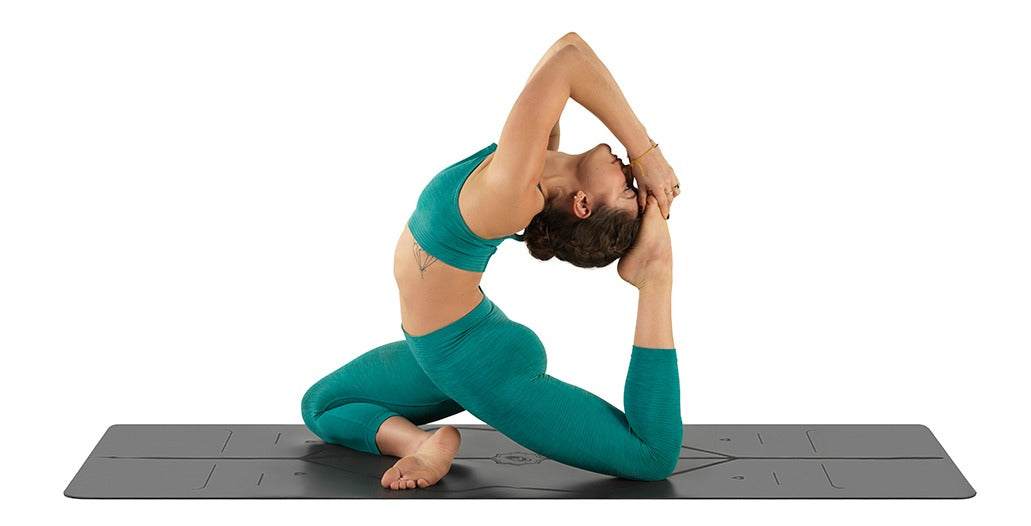
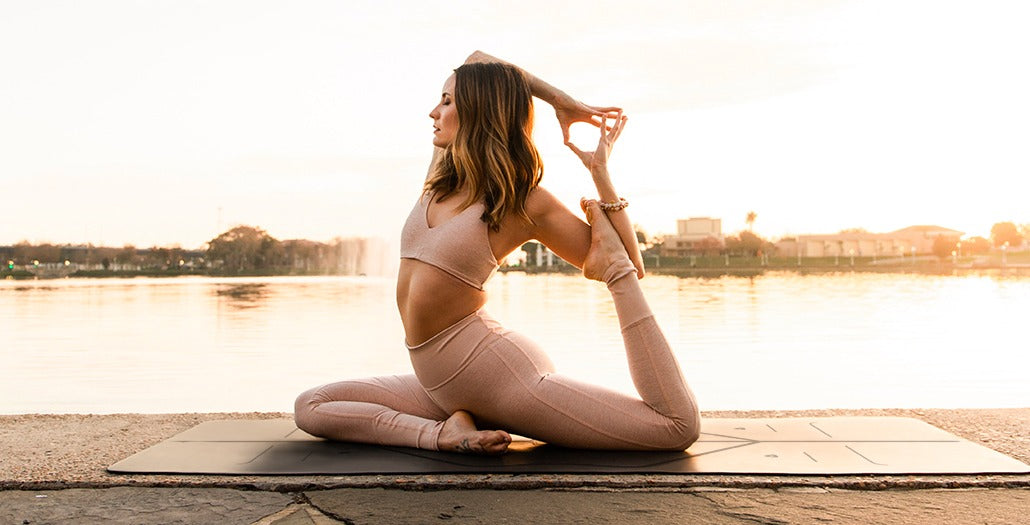
One-Legged King Pigeon Pose (Eka Pada Rajakapotasana)
Mermaid actually takes you a good bit of the way toward Full Pigeon and provides a good point of entry. A strap is really helpful for people with tight shoulders.
Instructions:
1. From Mermaid, release your overhead grip but keep your left foot in the crook of your left elbow and hugging in toward your left buttock.
2. Reach your right arm across the front of your chest and grab the toes of your left foot with your right hand. Bring your left arm up to the ceiling while turning your chest toward the front of the mat.
3. Bend your left elbow and drop your left hand over your shoulder and behind your back so that you can reach your left toes with your left hand.
4. Release your right hand and extend that arm toward the ceiling. Bend your right elbow to drop your right hand behind your back and reach your left toes. At this point, your arms are in a symmetrical position: elbows pointing toward the ceiling, hands dropped behind the back and holding the left foot. If this isn’t possible, loop a strap over the left foot and hold it with both hands.
5. Open your chest and throat toward the ceiling and extend the crown of your head back toward your left foot.
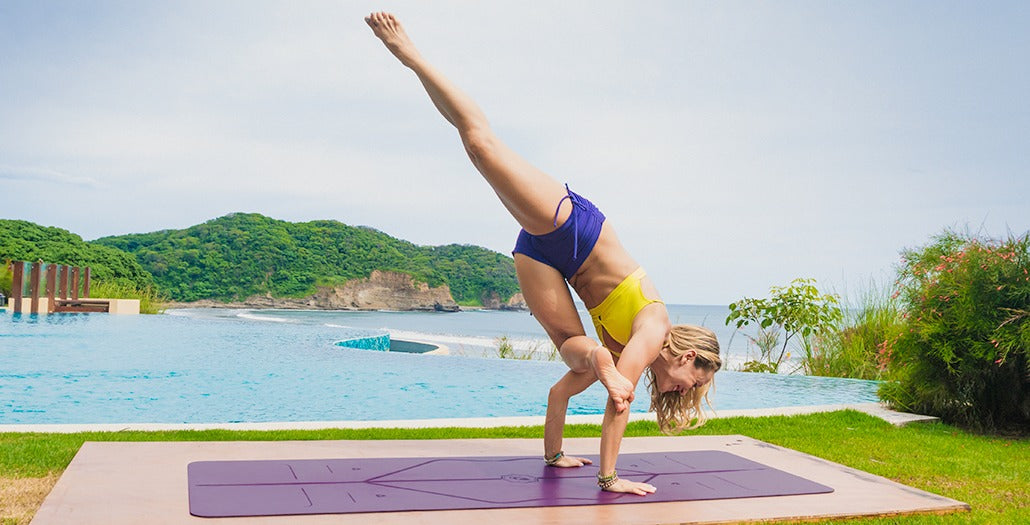
Bonus Pose! Flying Pigeon (Eka Pada Galvasana)
If your Pigeon is pretty strong, it might be ready to take flight. This arm balance is based on the same leg position as Pigeon Prep.
Instructions
1. From Mountain Pose, soften both knees. Lift your right foot from the floor and bring your right ankle to the top of your left thigh (this position might be familiar from Eye of the Needle, above).
2. Forward fold over both legs, bending the left knee to bring both palms flat on the floor in front of you.
3. Hook your right foot strongly around your left upper arm.
4. Continue bending your left knee until the right knee rests on the right upper arm. Bend your elbows back towards a Chaturanga position, making the upper arms into a shelf for the right shin.
5. Once the shin is secure on its shelf, begin to bring out weight forward into your hands, lifting the left toes away from the floor.
6. Firm into your front leg and begin to straighten the left leg toward the back of your mat. The more active you make the left leg, the easier it is to keep it lifted off the ground.
A Pigeon for Every Practice
There really is a Pigeon for everyone. If hip opening is difficult for you, know that it does get easier with regular practice. Eye of the Needle is a great warm-up to do when you first get on your mat or while you’re waiting for class to start. Pigeon Prep feels wonderful at the end of a yoga session when the muscles are warm and you’re moving toward stillness. Use props as necessary and little by little you will start to see improvement.
Love,
Liv x
Mermaid Pose image credit: @whitneydavisyoga