€ EUR
€ EUR

Though all yoga poses are created equal, some just look cooler. Arm balances top that list.
Yoga arm balances are any poses in which your hands are the primary points of contact with the mat while your feet float free. There’s quite a lot of room for variation within that definition, and some arm balances are unquestionably more challenging than others. Core strength, flexibility, and body awareness are the keys.
Intermediate yoga students can begin to tackle some Arm Balances, and once you get the hang of them, more advanced versions can quickly become more accessible. Finding your center of gravity is the most crucial step.
Before You Begin
-
Warm with some Vinyasas, including Chaturangas, and hamstring stretches.
-
Remember to press actively through your palms to lessen the strain on your wrists throughout.
-
Prepare your props, including a grippy yoga mat, blankets for crash landings, and blocks, which can be used to lift your feet off the floor when you are starting out.
🧘 Tip from a Yogi
"You’ll probably notice a lot of talk about floating your feet off the floor in arm balances, which sounds like a big joke when your feet are stuck solidly on the ground. However, when you get the balance right, it does begin to feel like your feet really have no choice but to rise. Arm balances aren’t about using strength to lift your legs, but rather about finding the tipping point when they do, in fact, float. "
The 11 Best Yoga Arm Balances
Getting Started
Crow is often taught as the entry-level Arm Balance since it’s one of the more straightforward and stable. Some people find Side Crow easier, however. Try both!
 Featured Yoga Mat: Cosmic Moon in Black
Crow Pose (Kakasana)
Sanskrit Meaning: Kaka (Crow) Asana (Pose)
Yoga Level: Intermediate
Why This Pose: A good place to pay with balance and find your center of gravity
Step-by-Step Instructions:
1. Begin in Garland Pose (Malasana).
2. Place your palms on the mat with your arms extended.
3. Lift your hips and come onto the balls of your feet.
4. Bend your elbows straight back so that your knees come onto your upper arms.
5. Lift your head.
6. Shift your weight forward and come onto your toes.
7. Keep moving forward until you can lift one foot at a time off the floor.
 Featured Yoga Mat: Liforme Classic Yoga Mat in Grey
Side Crow (Parsva Bakasana)
Sanskrit Meaning: Parsva (Side) Baka (Crane) Asana (Pose)
Yoga Level: Intermediate
Why This Pose: The Chaturanga arm position is inherently stable and is a building block for many other arm balances.
Step-by-Step Instructions:
1. Begin in Chair Pose (Utkatasana) with your hands in Anjali mudra at your sternum.
2. Come into Revolved Chair by twisting your upper body to the right and bringing your left elbow outside your right thigh.
3. Bend your knees fully, come onto the balls of your feet, and lower your palms to the floor outside your right foot and shoulder-distance apart.
4. Feel the points of contact between your right elbow and your right hip and your left elbow and the outside of your right knee.
5. Take your gaze between your hands but keep your head lifted.
6. Bend your elbows straight back.
7. Lean forward until your feet begin to lift from the floor.
8. Check your arm position. Your upper arms stay parallel to the floor and perpendicular to your forearms, as in Chaturanga.
9. Once this position becomes very comfortable, set up with your left elbow between your right knee and hip and your right elbow outside your right hip. When you come forward, all your weight is then on the left arm.
10. Practice this pose on both sides.
Chaturanga Arms
Once you are comfortable with the Chaturanga-based arm position of Side Crow, many other Arm Balances with the same bent arms open up.
 Featured Yoga Mat: Liforme X You Personalized Yoga Mat
Eka Pada Koundinyasana I
Sanskrit Meaning: Eka (One) Pada (Leg) Koundinya (Sage) Asana (Pose)
Yoga Level: Advanced
Why This Pose: Builds directly on Side Crow
Step-by-Step Instructions:
1. Begin in Side Crow facing the right.
2. Extend your right (bottom) leg to the left.
3. Extend your left (top) leg toward the back of the room.
4. Maintain Chaturanga arms.
5. Draw your legs back into Side Crow before switching sides.
 Featured Yoga Mat: Liforme Class Yoga Mat in Aqua Teal
Eka Pada Koundinyasana II
Sanskrit Meaning: Eka (One) Pada (Leg) Koundinya (Sage) Asana (Pose)
Yoga Level: Advanced
Why This Pose: Another place to play with extended legs.
Step-by-Step Instructions:
1. Begin in Lizard Pose (Uttan Pristhasana) with your arms straight and your right foot forward.
2. Take your right hand outside your right foot.
3. Bend your elbows straight back so that the back of your right thigh rests in your right upper arm.
4. Tuck your left elbow under your left hip point.
5. Shift your weight forward and slide your right foot forward to extend your right leg.
6. Float both feet off the floor.
7. Point your left foot to keep your left leg active and engaged.
8. Release both feet to the floor and switch sides.
 Featured Yoga Mat: Radiant Sun in Yellow
Flying Crow (Eka Pada Galavasana)
Sanskrit Meaning: Eka (One) Pada (Foot) Galava (Sage) Asana (Pose)
Also Known As: Flying Pigeon
Yoga Level: Advanced
Why This Pose: Advanced yoga poses begin to combine familiar elements in challenging ways
Step-by-Step Instructions:
1. Begin in Chair Pose.
2. Take your left ankle to the top of your right thigh.
3. Forward bend, bringing your palms to the mat in front of your right foot.
4. Hook your left foot around your upper right arm and bring your left knee to the upper left arm.
5. Deepen the bend in your right knee and come onto the ball of your right foot.
6. Bend your elbows straight back, making a shelf with your upper arms.
7. Shift your weight forward and into your hands until your right foot lifts off the floor.
8. Keep your head up and extend your right leg behind you.
9. Keep both feet active.
10. Reverse the process to return to Chair Pose and switch sides.
 Featured Yoga Mat: XL Mountain Mat
Grasshopper Pose
Yoga Level: Advanced
Why This Pose: Builds on Flying Crow by adding a twist
Step-by-Step Instructions:
1. Begin in Chair Pose.
2. Take your left ankle to the top of your right thigh.
3. Bring your hands to Anjali mudra at your sternum.
4. Twist to the right, bringing your upper left arm to the sole of your left foot.
5. Bend your right leg to come into a squat, planting your palms to the floor outside your right foot.
6. Shift your weight forward into your hands, bringing your left foot to stand on your upper left arm as your right foot floats off the floor.
7. Extend your right leg to the left with the foot flexed.
8. Reverse the process to return to Chair Pose and switch sides.
 Featured Yoga Mat: Liforme X You Personalized Yoga Mat
Eight-Angle Pose (Astavakrasana)
Sanskrit Meaning: Asta (Eight) Vakra (Crooked) Asana (Pose)
Yoga Level: Advanced
Why This Pose: The bound legs here help with balance.
Step-by-Step Instructions:
1. Begin in Staff Pose (Dandasana).
2. Bring your left leg over your left arm as close to your shoulder as you can.
3. Hook your right ankle over the left.
4. Press into your palms to lift your seat off the floor.
5. Lean your upper body forward and extend both legs to the left.
6. Return to an upright position and lower your seat to the floor.
7. Repeat on the other side.
Straight Arms
Straightening the arms creates a new movement pattern and centre of balance. When you remove the “shelf” created by bent arms, your core and legs have to work harder.
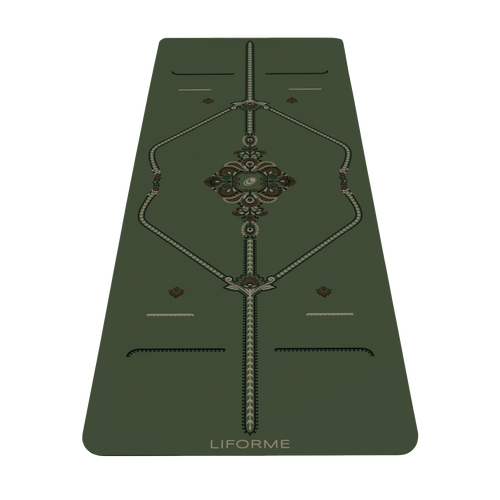
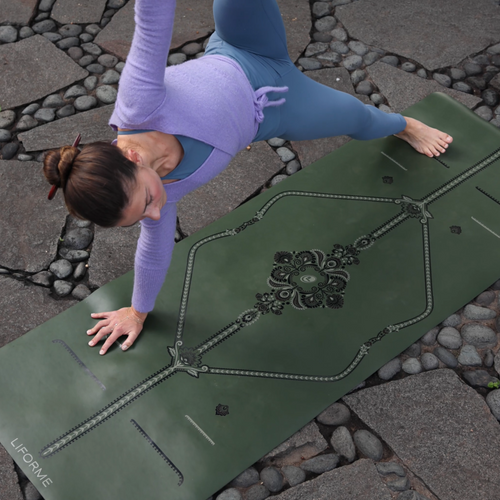
 Featured Yoga Mat: Liforme Classic Yoga Mat in Olive
Arm Pressure Pose (Bhujapidasana)
Sanskrit Meaning: Bhuja (Shoulder) Pida (Pressure) Asana (Pose)
Yoga Level: Advanced
Why This Pose: An introduction to hugging your legs into your arms for traction.
Step-by-Step Instructions:
1. Begin in Garland Pose.
2. Lift your seat and take your palms flat behind your feet.
3. Lower your thighs onto your upper arms.
4. Shift your weight back to float your feet.
5. Hook your ankles in front of you.
6. Hug your upper arms with your thighs and straighten your arms.
 Featured Yoga Mat: Liforme Classic Yoga Mat in Pink
Firefly Pose (Tittibhasana)
Sanskrit Meaning: Tittibha (Firefly) Asana (Pose)
Yoga Level: Advanced
Why This Pose: Builds on Bhujapidasana
Step-by-Step Instructions:
1. Begin in Garland Pose.
2. Lift your seat and take your palms flat behind your feet.
3. Lower your thighs onto your upper arms.
4. Shift your weight back to float your feet.
5. Straighten your legs so they form a V shape.
6. Hug your upper arms with your thighs and straighten your arms.

Crane (Bakasana)
Sanskrit Meaning: Baka (Crane) Asana (Pose)
Yoga Level: Advanced
Why This Pose: A more challenging version of Crow Pose
Step-by-Step Instructions:
1. Begin in Crow Pose.
2. Press your knees into the backs of your arms.
3. Straighten your arms, leaning forward a bit more for balance.
Doing Their Own Thing
Poses that don’t follow the usual patterns.

Peacock (Mayurasana)
Sanskrit Meaning: Mayura (Peacock) Asana (Pose)
Yoga Level: Advanced
Why This Pose: Peacock requires a different approach, which keeps things interesting
Step-by-Step Instructions:
1. Begin on your hands and knees.
2. Rotate your arms so that your fingers point toward the back of your mat.
3. Lean forward and bend your elbows back.
4. Round your spine and lower your abdomen onto your elbows.
5. Lean forward to lift your knees off the floor and float your extended legs.
Tips for Progressing in Arm Balances
Lean forward more than you think
To float your feet, your upper body has to act as a counterbalance. This means leaning your weight forward quite a bit, probably more than you think, probably more than is comfortable at first. Once you get the sense of this balancing act, arm balances really open up.
Practice on your own
It’s difficult to progress in these poses if you only do them occasionally in class. Practice them consistently at home, where you may also feel more comfortable falling.
Keep your head up
Your head is heavy (10-12 pounds!). If you let it drop, it pulls you toward the ground. It’s crucial for balance to keep your head lifted.
Balancing Act
Arm balances often seem well-nigh impossible at first, but once you get the feel for it, you can often quickly make progress, making them fun and rewarding.
You may fall occasionally along the way, so set up a pillow ot blanket at the front of your mat when you are practicing. Having padding in place only softens your landing, but gives you the confidence to keep leaning forward, which is the key to floating your feet.
FAQs About Yoga Arm Balances
What are yoga arm balances?
Arm balances are poses in which only your hands are on the floor, and your feet are floating.
Are arm balances suitable for beginners?
Arm balances generally become more available to intermediate students, but there’s no reason why beginners can’t start working on Crow and Side Crow if they feel ready.
How do I build the strength for arm balances?
Work on core strength, because arm balances rely on that more than arm strength.
How do I protect my wrists in arm balances?
Press actively through the hands, including the palms and each finger down to the tips. Take a break if your wrists start to bother you.
Which arm balance should I learn first?
Crow and Side Crow are usually good places to start.
How long does it take to learn an arm balance?
That depends on a lot of factors, including preexisting strength and how regularly you practice them. If you really want to see progress, work on your chosen pose a little bit each day.