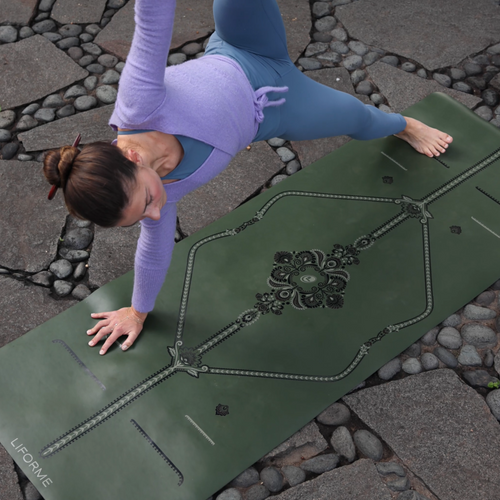
Tight hamstrings are one of the most common reasons that people begin yoga and stretching. They are endemic to contemporary life and can be related to a host of complaints, from plantar fasciitis in the feet to back pain.
Yoga offers many ways to stretch your hamstrings in standing, seated, and reclined positions. For best results, include these poses in a well-rounded yoga practice and get onto your mat at least three times a week.
What Are the Hamstrings?
The hamstrings are the group of three muscles and associated connective tissue that run along the backs of your thighs. The muscles are the biceps femoris, semitendinosus, and semimembranosus. The hamstrings are used for walking, running, climbing, squatting, and bending your knees.
What Causes Tight Hamstrings?
As most people move into adulthood, they lose flexibility and become more sedentary. Even if you stay active, you probably start to spend more time sitting at a desk or in a car, which causes the hamstrings to tighten up.
Ironically, running a lot, which causes hamstring fatigue, can also be a cause of tightness and pain. Whatever the reason, a good yoga routine can help loosen things up.
How Can Yoga Help with Tight Hamstrings?
A regular yoga practice is one of the best ways to address tight hamstrings. Because yoga is a whole-body practice, you’ll be stretching the backs of the legs in many poses while improving your overall strength, flexibility, and mobility.
Consistency is key because it takes time to lengthen tight muscles. Yoga is ideal for this purpose, because there’s plenty in the practice to keep you engaged and interested. You may come for the hamstring stretches but stay for the overall improvement in your sense of well-being.
The Best 13 Poses for Tight Hamstrings

Reclined Hand-to-Big-Toe Pose (Supta Padangusthasana)
Sanskrit Meaning: Supta (Reclined) Padangusta (Big Toe) Asana (Pose)
Yoga Level: Beginner
Pose Type: Supine
Why this Pose: Using a strap allows you to extend your leg fully for the best stretch.
Props: A strap
Step-by-Step:
1. Lie on your back with both legs extended.
2. Bend your right knee and hug it toward your chest.
3. Loop a strap around the sole of your right foot.
4. Holding the ends of the strap in each hand, extend your right leg toward the ceiling.
5. Flex your right foot as if you were stamping the ceiling.
6. Draw gently on the ends of the strap to bring your foot closer to your face. (It will probably still be a long way from your face!)

Half Monkey Pose (Ardha Hanumanasana)
Sanskrit Meaning: Ardha (Half) Hanuman (Hindu Monkey God) Asana (Pose)
Yoga Level: Beginner
Pose Type: Kneeling
Why this Pose: This supported hamstring stretch helps prepare your body for Full Hanumanasana (a full split).
Props: Use blocks under your hands and a Yoga Pad or blanket under your knee.
Step-by-Step:
1. Begin on your hands and knees.
2. Step your right foot to the inside of your right hand.
3. Scoot your right heel forward until your right leg is straight, taking a block under each hand if necessary.
4. Flex your right foot strongly and keep your back and neck long.

Gate Pose (Parighasana)
Sanskrit Meaning: Parigha (A bar used for shutting a gate) Asana (Pose)
Yoga Level: Beginner
Pose Type: Kneeling
Why this Pose: Not all hamstring stretches are forward folds. You want to get in there from the side as well.
Props: Use a Yoga Pad or blanket under your knee if it’s sensitive.
Step-by-Step:
1. Begin in a kneeling position with your hips over your knees.
2. Extend your right leg out to the right side while keeping your hips squared to the front.
3. Lean your upper body the right and reach your right arm down your right leg, opening your left side body.
4. Take your left arm over your head and reach it to the right.
5. Take your gaze under your left arm.

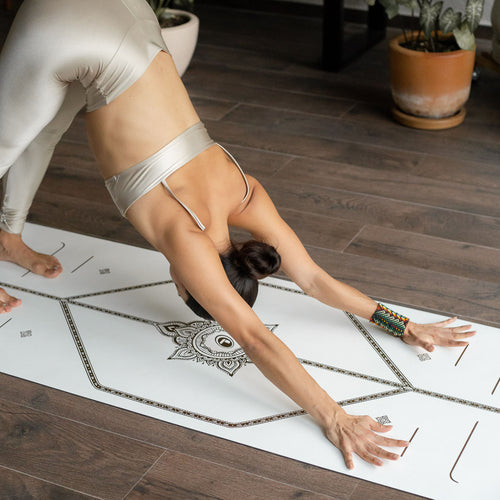
Downward Facing Dog Pose (Adho Mukha Svanasana)
Sanskrit Meaning: Adho (Down) Mukha (Face) Svana (Dog) Asana (Pose)
Yoga Level: Beginner
Pose Type: Standing
Why this Pose: Pretty much the ideal way to stretch your hamstrings.
Step-by-Step:
1. Begin on your hands and knees with your toes tucked under.
2. On an exhalation, push into your hands to lift your butt toward the ceiling and straighten your legs.
3. Bend one leg at a time to stretch into your hamstrings.
4. Release your heels toward the floor.

Standing Forward Fold (Uttanasana)
Sanskrit Meaning: Uttana (Intense) Asana (Pose)
Yoga Level: Beginner
Pose Type: Standing
Why this Pose: Let gravity help you stretch the backs of your legs. Start with softly bent knees and work toward straightening your legs.
Step-by-Step:
1. Begin in Mountain Pose.
2. Take your arms up toward the ceiling.
3. Take your arms out to the sides and your chest forward to swan-dive over your legs.
4. Soften your knees and release your head.
5. Bring your hands to the floor, to your legs, or let them hang.
6. Straighten your legs any amount.

Wide-Legged Standing Forward Bend Pose (Prasarita Padottanasana)
Sanskrit Meaning: Prasarita (Spread Out) Pada (Feet) Uttana (Intense) Asana (Pose)
Yoga Level: Beginner
Pose Type: Standing
Why this Pose: A standing forward fold with wide legs uses gravity to get into different parts of the hamstrings.
Step-by-Step:
1. Face the long side of your mat and take a wide stance with your legs apart.
2. Bring your chest forward to release your upper body over your wide legs.
3. Let your head hang heavy.
4. Bring your hands to the floor.
5. Try to keep your hips in line with your ankles instead of letting your hips drift back.

Side Lunge Pose (Skandasana)
Sanskrit Meaning: Skanda (Hindu War God) Asana (Pose)
Yoga Level: Intermediate
Why this Pose: A deeper side approach to the hamstring stretch.
Props: A blanket
Step-by-Step:
1. Face the long side of your mat and take a wide stance with your legs apart. Turn your toes out.
2. Bend your right leg to come into a squat while your left leg stays extended.
3. If your right heel comes off the floor, put a blanket under it so you can ground through the whole foot.
4. Bring your hands to Anjani mudra at your heart.

Pyramid Pose (Parsvottanasana)
Sanskrit Meaning: Parsva (Side) Uttana (Intense Stretch)
Yoga Level: Beginner
Why this Pose: Stretch the hamstrings in both legs while keeping your hips squared to the front of your mat.
Props: Use blocks if your hands don’t comfortably reach the floor.
Step-by-Step:
1. Begin in Mountain Pose.
2. Step your left foot back about halfway down the mat and out toward the left side of your mat. (You can adjust your stance later if necessary.)
3. Turn your left toes out 45 degrees.
4. Bring your hands to your hip points to make sure they are balanced and facing forward.
5. Keeping your spine straight, forward fold over your front leg.
6. Bring your hands to the floor or onto blocks.

Triangle Pose (Trikonasana)
Sanskrit Meaning: Trikona (Triangle) Asana (Pose)
Yoga Level: Beginner
Why this Pose: Opening your hips to the side of your mat gives the hamstrings a different stretch.
Props: A block under the lower hand can be helpful.
Step-by-Step:
1. Begin in Warrior II with your right leg forward.
2. Straighten your right leg.
3. Reach your right arm toward the front of the room.
4. Release your right hand to your right ankle, shin, or a block.
5. Open your chest to take your left arm and your gaze toward the ceiling.

Half Moon Pose (Ardha Chandrasana)
Sanskrit Meaning: Ardha (Half) Chandra (Moon) Asana (Pose)
Yoga Level: Intermediate
Why this Pose: Your standing leg gets one of the best hamstring stretches in the game.
Props: A block under your lower hand can improve your alignment.
Step-by-Step:
1. From Triangle Pose, above, bend your right knee.
2. Move your right hand to the outside and about 12 inches forward of your right foot as you lift your left foot away from the floor.
3. Straighten both legs. Stack your left hip on top of your right hip and flex your left foot strongly.
4. Take your left arm and your gaze toward the ceiling.

Extended Hand-to-Big Toe Pose (Utthita Hasta Padangustasana)
Sanskrit Meaning: Utthita (Extended) Hasta (Hand) Padangustha (Big Toe) Asana (Pose)
Yoga Level: Intermediate
Why this Pose: More advanced postures combine multiple challenges. In this case, it’s balancing on one leg while extending the other.
Props: A strap
Step-by-Step:
1. From Mountain Pose, transfer your weight into your right leg and hug your left knee to your chest.
2. Hold your left big toe with your left peace fingers or take a strap around the sole of your left foot.
3. Keeping your spine vertical, extend your left leg straight toward the front of the room. If your leg is bent or your left arm pulls out of its socket, use a strap.
4. Optionally open your left leg out to the left.

Head-to-Knee Pose (Janu Sirasana)
Sanskrit Meaning: Janu (Knee) Sirsa (Head) Asana (Pose)
Yoga Level: Beginner
Pose Type: Seated
Why this Pose: Stretching one leg at a time can allow you to go deeper.
Props: Use a strap around your foot to facilitate traction if your hands don’t reach.
Step-by-Step:
1. Begin seated in Staff Pose (Dandasana) with both legs extended.
2. Bend your right knee and draw it toward your chest. Keep your right sole on the floor.
3. Open your right knee to the right, bringing your right sole to the inside of your left thigh.
3. On an exhalation, forward fold over your extended left leg.
4. Hold onto your left foot, calf, or a strap.

Seated Forward Fold Pose (Paschimottanasana)
Sanskrit Meaning: Paschima (West; the back of the body) Uttana (Intense Stretch) Asana (Pose)
Yoga Level: Beginner
Pose Type: Seated
Why this Pose: The classic seated forward fold uses the traction between hands and feet to deepen the hamstring stretch.
Props: Use a strap around your feet to facilitate traction if your hands don’t reach.
Step-by-Step:
1. Begin seated in Staff Pose (Dandasana) with both legs extended.
2. Bring your arms overhead.
3. On an exhalation, tip your pelvis forward to come into a forward fold over your legs.
4. Hold onto your feet or take a strap around both feet and hold one end in each hand.
Ham it Up
Practice hamstring stretches early and often as part of your consistent yoga routine and you’ll feel the results on and off your yoga mat.


