Flexibility could easily be described as both yoga’s blessing and its curse. On the blessing side, increased flexibility is an enormous benefit: it promotes the range of motion and joint health that help prevent back pain, repetitive-use damage, and sports injuries.
However, yoga is a lot more than flexibility. In fact, people who come to yoga with a lot of flexibility must be careful not to rush into advanced poses just because they can. Often, they need to work on their strength to complement all that bendiness, build support muscles, and make sure that they are practising safe alignment.
Fear of flexibility, or, more specifically, a lack of flexibility, also keeps a lot of people out of the yogasphere. It’s a common misconception that you need to be naturally flexible to even attempt to do yoga. So let’s dispel that myth right now. Shout this from the rooftops: Yoga is not reserved for people who are already very flexible.
If you have tight hips, hamstrings, calves, shoulders, whatever, yoga is exactly what you need. Flexibility is not a prerequisite; it’s a result. The person touching their nose to their knees does not win (at yoga); the person who improves their flexibility safely over time wins (at life!).
The 9 Best Yoga Poses for Flexibility
The poses below focus on common tight spots, including hamstrings, hips, and shoulders. Since yoga poses don’t usually work one area in isolation, however, you’ll also get the benefit of stretching the calves, quads, intercostals, and pectorals, just to name a few. When appropriate, we’ve included details on how to adapt the poses with props to make them more accessible and how to amplify for a deeper stretch. You can practice them individually or link them together to make a flow.

Reclined Hand to Big Toe Pose (Supta Padangusthasana)
Sanskrit Meaning: Supta (Reclined) Padangustha (Big Toe) Asana (Pose)
Yoga Level: Beginner
Pose Type: Supine
Benefits: Stretches hamstrings, calves, hips, and groin. Gently opens the back of the body.
Why this Pose: There are numerous ways to adapt this pose, most notably by using a strap around the instep of the lifted leg. If you don’t have a yoga strap, any belt will do, or just hold the back of your leg. Keeping your leg as straight as possible is the best way to stretch your groins, hips, hamstrings, calves. Don’t worry about how high you can lift your leg.
Step-by-Step Instructions:
- Lie on your back with your knees bent and the soles of both feet flat on the floor.
- Hug your right knee in towards your chest.
- Either take a yogi toe grip around the big toe or loop a strap around the instep of your right foot.
- Extend your right leg straight up toward the ceiling.
- If it feels comfortable, extend your left leg along the floor. It’s also ok to keep it bent with the foot flat.
- Activate both feet (point or flex).
- A hand on your left thigh can remind you to keep that hip grounded on the mat.
- Make sure to keep both the right femur (thigh bone) and the right humerus (upper arm bone) settled in their sockets.
- After five to ten breaths, repeat with the left leg.

Eye of the Needle Pose (Sucirandhrasana)
Sanskrit Meaning: Suci (Needle) Randhra (Hole) Asana (Pose)
Yoga Level: Beginner
Pose Type: Supine
Benefits: Gently opens the hips. Stretches the outer hips, glutes and hip flexors.
Why this Pose: This pose offers a wonderful way to stretch the hip flexors gently at first and then more deeply as flexibility becomes more available. If you are looking for more intensity, you can substitute in Pigeon.
Step-by-Step Instructions:
- Lie on your back with your knees bent and the soles of your feet on the floor.
- Place your right ankle on the top of your left thigh, just above the knee, opening your right knee to the right.
- Stay here for a gentle stretch, or lift your left foot off the floor and bring your left thigh towards your chest.
- Thread your right hand through the gap between your legs and clasp your hands behind your left thigh or around the front of your left shin.
- Draw your left knee closer to your chest, which will cause your right knee to move away from your chest.
- Keep your sacrum anchored to the floor and both feet active throughout.
- You can also use your right elbow to nudge your right knee further away from your chest as long as it’s comfortable.
- After five to ten breaths, switch legs.

Downward Facing Dog (Adho Mukha Svanasana)
Sanskrit Meaning: Adho (Downward) Mukha (Face) Svana (Dog) Asana (Pose)
Yoga Level: Beginner
Pose Type: Standing inversion
Benefits: Stretches hamstrings, calves, shoulders, and back. Builds strength in arms and legs.
Why this Pose: You didn’t think we’d leave out Down Dog, did you? It’s one of the most versatile yoga poses for flexibility, especially for the backs of the legs.
Step-by-Step Instructions:
- Come to your hands and knees with your wrists under your shoulders and the knees slightly behind your hips.
- Curl your toes under and lift your knees from the floor.
- Straighten your legs to lift your seat to the ceiling, creating an inverted V shape.
- Pedal your feet one at a time.
- Press strongly into the palms of your hands to support your shoulders.
- Once you’re ready, settle into relative stillness for at least five breaths.
- Keeping the spine long is a higher priority than getting your heels to the floor.

Crescent Lunge (Anjaneyasana)
Sanskrit Meaning: Anjani (Hindu Goddess) Asana (Pose)
Yoga Level: Beginner
Pose Type: Kneeling
Benefits: Stretches the hip flexors, quads, and intercostals (muscles between the ribs). Opens the chest.
Why this Pose: Anjaneyasana is a ‘choose your own adventure’ type of pose. You can lunge deeply or keep your pelvis over your back knee. Reaching the arms toward the ceiling also stretches the muscles between the ribs (intercostals). You can try reaching around for your back foot to add a quad stretch if you like. Pick a variation that works for you.
Step-by-Step Instructions:
- From Downward Facing Dog, step your right foot forward to the inside of your right hand. Give your foot a helping hand if needed.
- Lower your left knee to the mat. If you have sensitive knees, a Yoga Pad can make this more comfortable.
- Inhale to lift your arms overhead. Reach for the ceiling while keeping your shoulders relaxed away from your ears.
- For a deeper hip stretch, take your right knee forward a little or a lot, tracking over your toes.
- Optionally, for a quad stretch, lift your left heel toward your left glute.
- Reach your right arm behind your back to catch hold of your left foot or ankle. Draw your foot toward your butt.
- Stay three to five breaths in your chosen version of the pose before switching sides.

Pyramid Pose (Parsvottanasana)
Sanskrit Meaning: Parsva (Side) Uttana (Intense Stretch) Asana (Pose)
Yoga Level: Beginner
Pose Type: Standing
Benefits: Deeply stretches hamstrings, outer hips, and spine. Improves balance and stability.
Why this Pose: Pyramid gets deep into your hamstrings and hips. Use props as necessary and remember that both hip points face the front of the mat in this posture.
Step-by-Step Instructions:
- From Downward Facing Dog, step your right foot to the inside of your right hand.
- Step your left foot toward the front of your mat about five inches and out to the left side about three inches.
- Lower your left heel to the floor with your toes turned out roughly 45 degrees.
- Straighten both legs, lifting your hips. If your hands come off the floor, take blocks underneath them.
- Make sure both hip points are still facing the front of your mat. Adjust your back foot or widen your stance if needed.
- Inhale to come to a flat back.
- Exhale to lower your chest toward your right knee.
- Repeat this process of lengthening on the inhalation and deepening on the exhalation for about five breaths. Then switch sides.

Half Moon Pose (Ardha Chandrasana)
Sanskrit Meaning: Ardha (Half) Chandra (Moon) Asana (Pose)
Yoga Level: Intermediate
Pose Type: Standing
Benefits: Opens hamstrings, hips, ribs, and chest. Strengthens legs and core. Improves balance.
Why this Pose: Half Moon steps things up a bit by incorporating balance, but it’s also an exceptional way to open the hamstrings (yet again!), hips, ribs, and chest. If you are more of a beginner, you can substitute Triangle (Trikonasana) pose for a similar stretch with less chance of tipping over. A block also helps make this pose more accessible.
Step-by-Step Instructions:
- From Downward Facing Dog, step your right foot to the inside of your right hand.
- Keep your right knee soft as you take your right hand forward about 5-10 inches. Come up on your right fingertips or bring the block under your right hand.
- Bring your left hand to your left hip and shift your weight onto your right foot.
- Lift your left foot off the ground as you straighten your right leg.
- Stack your left hip over your right hip and lift your left leg to parallel to the floor, flexing the left foot.
- Lift your left arm up to the ceiling and open your chest to the left side.
- Take your gaze up to your left fingertips.
- If you want a quad stretch/balance challenge, bend your left knee and take your left heel toward your glutes. Release your left hand and reach behind you to grab your left foot.
- After around five breaths, try the other side.

Garland Pose (Malasana)
Sanskrit Meaning: Mala (Garland) Asana (Pose)
Yoga Level: Beginner
Pose Type: Standing
Benefits: Opens hips, ankles, and lower back. Stretches the inner thighs and can ease lower body stiffness.
Why this Pose: Squatting was once quite a natural way to sit, but most of us have lost the habit and, with it, the ease. If your heels come up a lot, take a rolled or folded blanket underneath them. You can also place a block under your seat for additional support if this squat is very intense for you.
Step-by-Step Instructions:
- Stand at the front of your mat with your feet about 12 inches apart.
- Turn your toes out and bend your knees to assume a deep squatting position.
- Bring your elbows to the insides of your knees and take your hands into Anjali Mudra at your heart.
- Use your elbows to gently push the knees apart.
- If the squat is very intense, place a block under your seat for support.

Half Lord of the Fishes Pose (Ardha Matsyendrasana)
Sanskrit Meaning: Ardha (Half) Matsyendra (Lord of the Fishes) Asana (Pose)
Yoga Level: Beginner
Pose Type: Seated twist
Benefits: Twists the spine. Stretches the outer hips and glutes.
Why this Pose: While it may seem like most of the action is in the upper body here, there’s a lot of passive stretching going on in the lower body too (especially in the hard to reach outer thigh, technically part of the glutes), so make sure to set it up carefully and keep the sole of your right foot in strong contact with the floor. Most of us don’t do much twisting in daily life, so start gently, and this will feel really good on your ribcage and back.
Step-by-Step Instructions:
- Sit cross-legged in Easy Pose (Sukhasana) with your right leg in front.
- Bring your right foot to the outside of your left thigh with the right knee pointing up and right sole flat on the floor.
- Scoot your left foot to the outside of your right buttock so the outside of the left foot rests on the floor.
- Inhale both arms up and exhale to twist to the right, bringing your right hand to the floor behind you and your left elbow to the outside of your right knee.
- Activate your left hand and press the right foot into your mat.
- Take your gaze over to the right, but make sure that your twist comes from your midsection, not your neck.
- On your inhalations, grow your spine long, and on your exhalations, deepen your twist by pressing your left elbow into your right thigh.
- After five to ten breaths, release and repeat on the other side.
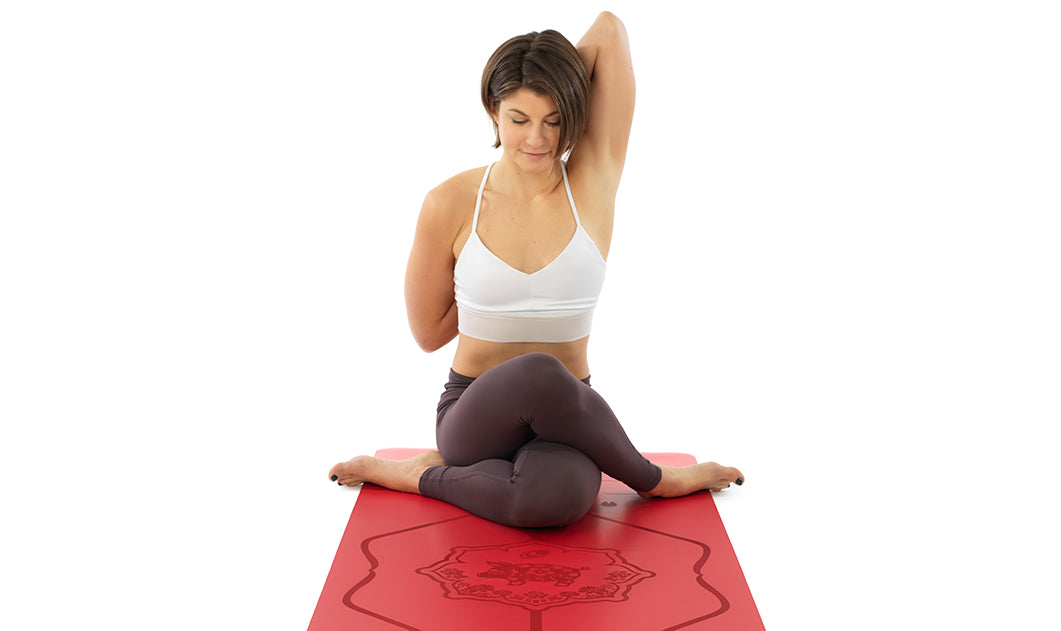
Cow Face Pose (Gomukhasana)
Sanskrit Meaning: Go (Cow) Mukha (Face) Asana (Pose)
Yoga Level: Intermediate
Pose Type: Seated
Benefits: Stretches outer hips, glutes, shoulders, chest, and upper back.
Why this Pose: Cow Face is another pose that takes the body to places we don’t normally go, and therefore is a really good antidote to all the slumped-over sitting we frequently do. This arm position can be quite challenging, so have a strap handy and get ready to stretch the biceps, pectorals, trapezius, and serratus anterior.
Step-by-Step Instructions:
- In a seated position, stack your right knee directly on top of your left knee at your midline, with the feet reaching toward the opposite buttock.
- Ground both sitting bones as evenly as you can.
- Lift your right arm up to the ceiling and then bend your elbow so that your right hand comes to your upper back.
- Reach your left arm to the side, then bend the elbow and bring your left hand up the centre of your back.
- The idea is for the hands to meet and clasp behind your back. If they don’t, use a strap between the hands or hold onto your shirt with each hand to create a bit of traction.
- If your hands are connected, you can press your head into your right arm gently.
- Keep hugging both elbows toward the midline for three to five breaths. Then release and try the other side.
Benefits of Yoga for Flexibility
- Supports healthy joints
- Improves range of motion and posture
- Reduces the risk of pain and injury
- Releases built-up physical tension
- Helps reduce stress and calm the nervous system
- Can support better sleep
How Does Yoga Help Improve Flexibility?
Yoga goes beyond “just” stretching by emphasizing safe form. The duration and variety of stretches that address both major muscle groups and deep-seated stealth muscles you might not even know you have (like the psoas and piriformis) also set yoga apart.
The yoga difference can be described with three 'A's: alignment, attention, and awareness.
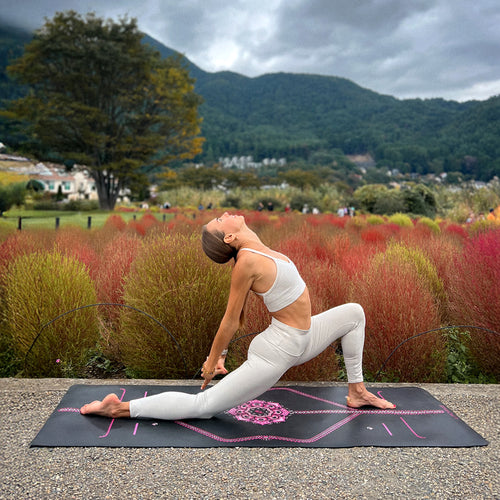
- Alignment is the precise way that each pose is done to maximise its benefits and minimise the risk of injury. This may include using props to support tight areas as they begin to open up. Practising with the insight of alignment helps ensure that you aren’t compromising one area of the body in an attempt to focus on another area. An experienced teacher helps bring alignment to the fore, as does using a yoga mat with alignment guides.
- Attention means you are not zoning out or just going through the motions, but rather feeling each pose to the fullest. This helps cultivate the body awareness necessary to distinguish between the discomfort that may arise in using your body in a new way and the pain that is the body’s signal to back off. No one else is in your body, so that’s a call only you can make.
- Awareness means that you remain completely focused on the present moment throughout your practice. Often, the physicality of yoga asana practice is enough to keep us anchored in the now. We also learn to use the breath to return to the body in the present again and again. Awareness is one of yoga’s greatest tools because it takes us out of our monkey mind and allows us to reset, reducing stress and anxiety.

How Long Does It Take to Become More Flexible with Yoga?
What’s the big hurry? As with all of yoga’s benefits, positive results come over time with consistent practice of a wide variety of postures. The sooner you start, the sooner you’ll see improvement, but there’s no fixed timeline for flexibility. Everyone starts in a different place, lives in a different body, and leads a different life. If you practise regularly, you’ll become more flexible.
Yoga classes are the ideal place to work on flexibility because you’ll receive expert instruction on the safest ways to incrementally boost flexibility and how to use props when necessary. If you know you lack flexibility, you may feel some trepidation about attending a public class, perhaps wondering if you’ll be the least bendy person in the room. Here’s the thing: no one cares. No one is going to call you out, and if they do, find another class.
All the Yoga for All the Flexibility
These poses are a good starting place, but remember that it’s really the whole 'body and mind' approach that makes yoga one of the most effective ways to improve your flexibility, as well as so many other aspects of your physical and mental health. The more you show up with patience and curiosity, the more your body and mind will loosen their grip.
Flexibility becomes less about touching your toes and more about feeling spacious in your body and in your life.
Yoga for Flexibility FAQs
Is yoga for flexibility good for beginners?
Yes. Yoga for flexibility is ideal for beginners as long as you move slowly, use props, and stay within a comfortable stretch instead of pushing into pain.
Which yoga poses for flexibility should I start with?
Begin with gentle yoga poses for flexibility like Eye of the Needle, Downward Dog, and Garland Pose to target tight hips and hamstrings.
How often should I do yoga to become more flexible?
Any consistent yoga practice will improve your flexibility over time. Try to make it onto your mat two to three times per week. Even doing a few stretches each day will help.
Can I do yoga for flexibility if I am very stiff?
Absolutely. You do not need to be flexible to start yoga. Use blocks and straps to bring the poses to you when necessary, and let your flexibility build gradually.
Will yoga poses for flexibility also build strength?
Yes. Many yoga poses for flexibility, like Crescent Lunge and Half Moon, also strengthen your legs and core, which helps you feel more stable as your range of motion increases.