€ EUR
€ EUR

Recreational rock climbing relies on a combination of agility, power, flexibility, and core strength, plus nerves and fingertips of steel. Yoga enhances all of these (except the fingertips!), which explains why it’s so often offered as a complementary exercise at rock climbing gyms.
Want to improve your hip and hamstring mobility for high stepping and heel hooking, access your deep core for stability, stretch out your hard-working shoulders, chest, and forearms, all while training your breath control and body awareness? Then yoga is the way to go.
The 22 Best Yoga Poses for Climbers
Hip Mobility & Hamstring Flexibility Poses
Open hips and hamstrings are the key to moving up and down any rock face or wall. These poses target the exact muscles that can improve your flexibility for climbing.
 Featured Yoga Mat: Liforme X You Personalized Yoga Mat
Wide-Legged Standing Forward Bend (Prasarita Padottanasana)
Sanskrit Meaning: Prasarita (Spread Out) Pada (Feet) Uttana (Intense) Asana (Pose)
Yoga Level: Beginner
Pose Type: Standing
Why This Pose: The wide-legged stance stretches the hamstrings to help you reach wide holds.
Step-by-Step Instructions:
1. Begin by facing the long side of your mat and taking your legs wide apart.
2. Inhale and take your arms overhead.
3. Exhale and rotate your pelvis forward to fold your torso over your legs.
4. Release your hands to the floor.
5. Take five to ten deep breaths.
 Featured Yoga Mat: Pasiley Passion in Maroon
Goddess Pose (Utkata Konasana)
Sanskrit Meaning: Utkata (Powerful) Kona (Angle) Asana (Pose)
Pose Level: Beginner
Pose Type: Standing
Why This Pose: Strengthens your quads while opening your hips. Replicates a position you take while climbing.
Step-by-Step Instructions:
1. Begin by facing the long side of your mat and taking your legs wide apart.
2. Turn your heels in 45 degrees.
3. Bend your knees over your ankles, adjusting your stance if necessary.
4. Continue opening your knees.
5. Take five deep breaths.
 Featured Yoga Mat: Liforme Classic Yoga Mat in Purple
Side Lunge Pose (Skandasana)
Sanskrit Meaning: Skanda (Hindu War God) Asana (Pose)
Yoga Level: Intermediate
Pose Type: Standing
Why This Pose: Mimics the leg positions required for high steps.
Step-by-Step Instructions:
1. Begin by facing the long side of your mat and taking your legs wide apart.
2. Turn your heels in 45 degrees.
3. Bend your right knee into a deep squat while extending your left leg straight.
4. Flex your left foot, coming onto your heel.
5. Keep your hands on the floor or bring them to Anjali mudra at your heart.
6. After five breaths, switch sides.
7. To challenge balance and mobility, move from side to side without using your hands.
 Featured Yoga Mat: Blossoming Lotus in Purple
Eka Pada Rajakapotasana (Pigeon Pose Prep)
Sanskrit Meaning: Eka (One) Pada (Foot) Raja (King) Kapota (Pigeon) Asana (Pose)
Yoga Level: Beginner
Pose Type: Seated
Why This Pose: External rotation of the femurs stretches the muscles that connect your pelvis to your legs, improving mobility.
Step-by-Step Instructions:
1. Begin in a hands-and-knees position.
2. Bring your right knee to the outside of your right hand and your right ankle close to your left hand.
3. Extend your left leg back.
4. Use a blanket or block under your right hip for support.
5. Lower your upper body towards the floor, bringing a little weight onto your right leg if it feels good.
6. After five to ten breaths, switch sides.
 Featured Yoga Mat: Liforme Classic Yoga Mat in Dusk Blue
Garland Pose (Malasana)
Sanskrit Meaning: Mala (Garland) Asana (Pose)
Yoga Level: Beginner
Pose Type: Standing
Why This Pose: Another way to get deep into the hips.
Step-by-Step Instructions:
1. Begin in Mountain Pose (Tadasana).
2. Turn your toes out 45 degrees.
3. Bend your knees and lower your seat to come into a deep squat.
4. If your heels are hovering, use a rolled blanket under them for support.
5. Take your elbows to the inside of your knees and bring your palms together.
6. Take five to ten breaths.
 Featured Yoga Mat: Liforme Classic Yoga Mat in Blue
Lizard Pose (Uttan Pristhasana)
Sanskrit Meaning: Uttan (Intense) Pristha (Back) Asana (Pose)
Yoga Level: Intermediate
Pose Type: Standing
Why This Pose: Another high step proxy.
Step-by-Step Instructions:
1. Begin in Downward Facing Dog (Adho Mukha Svanasana).
2. Step your right foot to the outside of your right hand.
3. Turn your right toes out.
4. Lower your elbows to the mat.
5. Release your left knee to the floor to work on mobility or keep it up to build strength.
6. After five to ten breaths, switch sides.
 Featured Yoga Mat: Radiant Sun in Yellow
Triangle Pose (Trikonasana)
Sanskrit Meaning: Trikona (Triangle) Asana (Pose)
Yoga Level: Beginner
Pose Type: Standing
Why This Pose: Stretches your hamstrings and hips while also opening your chest.
Step-by-Step Instructions:
1. Begin in Downward Facing Dog (Adho Mukha Svanasana).
2. Step your right foot inside your right hand.
3. Turn your left heel in so your foot is parallel to the back of your mat.
4. Come up to stand with both legs straight and your arms parallel to the floor.
5. Check that your front heel is aligned with your back arch and your hips are facing the long side of your mat.
6. Reach your right hand forward and then down to the floor, a block inside your right foot, or your shin.
7. Turn your chest and your gaze to the left.
Shoulders & Chest Poses
Pulling and gripping can result in tightness and soreness. These poses stretch out the upper body to keep you moving well.

Puppy Pose (Uttana Shishosana)
Sanskrit Meaning: Uttana (Intense) Shisho (Puppy) Asana (Pose)
Yoga Level: Beginner
Pose Type: Kneeling
Why This Pose: A deep stretch for tight shoulders
Step-by-Step Instructions:
1. Begin on your hands and knees.
2. Keep your hips stacked over your knees as you walk your hands forward.
3. Keep walking your hands forward until you reach maximum extension.
4. Lower your forehead or your chin to the mat or a block.
5. Take five to ten breaths.
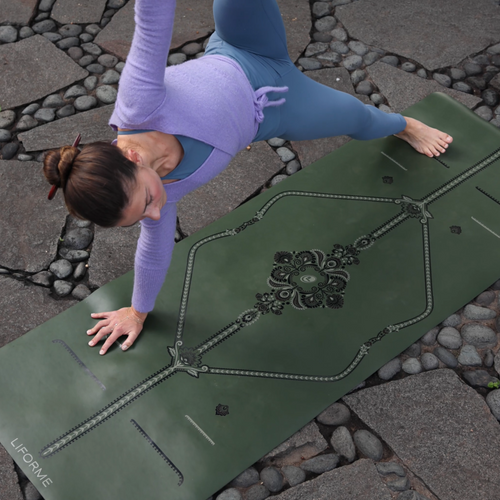
 Featured Yoga Mat: Liforme Classic Yoga Mat in Deep Forest Green
Downward Facing Dog (Adho Mukha Svanasana)
Sanskrit Meaning: Adho (Down) Mukha (Face) Svana (Dog) Asana (Pose)
Yoga Level: Beginner
Pose Type: Standing
Why This Pose: A full-body stretch, including your shoulders and hamstrings
Step-by-Step Instructions:
1. Begin on your hands and knees.
2. On an exhalation, press into your hands to lift your hips and straighten your legs, bringing your body into an inverted V position.
3. Release your shoulder blades down your back and outwardly rotate your upper arms to open your traps.
4. Release your heels towards the floor and let your head hang heavy.
5. Take five or more deep breaths

Locust Pose (Salabhasana)
Sanskrit Meaning: Salabha (Locust) Asana (Pose)
Yoga Level: Beginner
Pose Type: Prone
Why This Pose: Strengthens your back while also opening the chest
Step-by-Step Instructions:
1. Lie on your stomach with your forehead on the floor and your arms at your sides.
2. Tuck your tailbone, pressing your pelvis down.
3. On an inhalation, lift your head, chest, arms, and legs off the floor.
4. Take at least three breaths, then release.
 Featured Yoga Mat: Liforme Classic Yoga Mat in Grey
Cow Face Pose (Gomukhasana)
Sanskrit Meaning: Go (Cow) Mukha (Face) Asana (Pose)
Yoga Level: Beginner
Pose Type: Seated
Why This Pose: Simultaneously stretch your outer hips and shoulders.
Step-by-Step Instructions:
1. Begin seated in a cross-legged position.
2. Bring your knees together at the center line, stacking the right knee over the left knee.
3. Bring your left arm up towards the ceiling, bend at the elbow, and release your hand to the center of your back.
4. Take your right arm down, bend at the elbow, and take your right hand up the center of your back.
5. Bring your hands to touch behind your back or use a yoga strap to connect them.
6. Keep your chest open and your spine long.
7. After three to five breaths, release and switch sides.
Core & Stability Poses
Core strength keeps you stable and safe, especially when you’re hanging. Target your deep core and spinal support muscles with these poses.
 Featured Yoga Mat: Tantalising Terracotta
Balancing Table Pose (Dandayamana Bharmanasana)
Sanskrit Meaning: Danda (Staff) Yamana (Restraining) Bharmana (Table) Asana (Pose)
Also Known As: Bird Dog Pose
Yoga Level: Beginner
Pose Type: Kneeling
Why This Pose: Lifting the opposite arm and leg challenges your balance and improves coordination
Step-by-Step Instructions:
1. Begin on your hands and knees with your wrists under your shoulders and your knees under your pelvis.
2. Extend your right leg to the back of the mat, lifting your foot off the floor and bringing your heel in line with your hip so your leg is parallel to the floor.
3. Extend your left arm forward, also parallel to the floor.
4. Hold this position for 3 to 5 breaths, then switch sides.
 Featured Yoga Mat: Cosmic Moon in Black
Plank Pose (Phalakasana)
Sanskrit Meaning: Phalaka (Plank) Asana (Pose)
Yoga Level: Beginner
Pose Type: Arm Support
Why This Pose: A strong core is essential for climbing
Step-by-Step Instructions:
1. Begin on your hands and knees with your wrists under your shoulders and your knees under your pelvis.
2. Extend your legs to the back of the mat one at a time, coming onto the balls of your feet.
3. Maintain a straight line from the crown of your head to your heels.
4. Challenge yourself to a long hold of a minute or longer.
 Featured Yoga Mat: Black & Gold
Side Plank (Vasisthasana)
Sanskrit Meaning: Vasistha (An ancient poet and sage) Asana (Pose)
Yoga Level: Intermediate
Pose Type: Arm Support
Why This Pose: Targets the oblique muscles
Step-by-Step Instructions:
1. Begin in a Plank Pose.
2. Lift your left hand off the floor as you rotate your chest to face the left and stack your left foot on top of your right foot.
3. Take your left arm and your gaze straight up towards the ceiling.
4. Take three to five breaths, then switch sides.
 Featured Yoga Mat: Paisley Passion in Olive
Dolphin Pose (Ardha Pincha Mayurasana)
Sanskrit Meaning: Ardha (Half) Pincha (Feathered) Mayur (Peacock) Asana (Pose)
Yoga Level: Intermediate
Pose Type: Inversion
Why This Pose: Improves both shoulder and core strength
Step-by-Step Instructions:
1. Begin in a Downward Facing Dog Pose.
2. Lower your elbows to the floor one at a time or simultaneously.
3. Walk your feet towards your elbows as much as possible.
4. Take 5 to 10 breaths.
 Featured Yoga Mat: Liforme Classic Yoga Mat in Pink
Boat Pose (Navasana)
Sanskrit Meaning: Nava (Boat) Asana (Pose)
Yoga Level: Beginner
Pose Type: Seated
Why This Pose: Drawing your upper and lower body together works your core
Step-by-Step Instructions:
1. Sit with your knees bent and the soles of your feet on the mat
2. Lift your feet, bringing your shins parallel to the floor.
3. Take your arms straight alongside your body with the palms facing up
4. If you can maintain the position of your thighs and abdomen, extend your legs.
5. Take at least five breaths, then lower down.
Wrist, Hand & Forearm Relief
Climbers’ hands and forearms are under constant strain, so it’s important to do counter stretches and release tension.

Anjali Mudra
Sanskrit Meaning: Anjali (Reverence or offering) Mudra (Seal)
Yoga Level: All levels
Pose Type: Hand gesture (Mudra)
Why This Pose: A gentle stretch for your wrists
Step-by-Step Instructions:
1. Bring your palms to touch at your sternum with your forearms parallel to the floor.
2. Press your palms together to intensify the wrist stretch.

Sphinx Pose (Salamba Bhujangasana)
Sanskrit Meaning: Salamba (Supported) Bhujanga (Cobra) Asana (Pose)
Yoga Level: Beginner
Pose Type: Prone
Why This Pose: Gentle pressure on the forearms releases tension
Step-by-Step Instructions:
1. Lie on your stomach with your torso propped up on your elbows.
2. Make sure your elbows are under your shoulders, and your forearms are parallel.
3. Press gently into your palms and forearms.
Recovery Poses
Prepare to climb another day with poses that encourage release and restoration.

Cat-Cow Stretch (Marjaryasana-Bitilasana)
Sanskrit Meaning: Marjari (Cat) Asana (Pose) and Bitila (Cow) Asana (Pose)
Yoga Level: Beginner
Pose Type: Kneeling
Why This Pose: Releases spinal tension and improves mobility
Step-by-Step Instructions:
1. Begin on your hands and knees with your wrists under your shoulders and your knees under your pelvis.
2. On an inhalation, lift your tailbone, lower your belly, and lift your head.
3. On your next exhalation, tuck your tail, round your spine, and drop your head.
4. Repeat this movement cycle for five to ten inhalations and exhalations.
 Featured Yoga Mat: Rainbow in Blue Sky
Child’s Pose (Balasana)
Sanskrit Meaning: Bala (Child) Asana (Pose)
Yoga Level: Beginner
Pose Type: Kneeling
Why This Pose: Releases the hips, back, and shoulders.
Step-by-Step Instructions:
1. Begin on your hands and knees.
2. Take your knees wide and bring your big toes to touch.
3. Lower your seat onto your heels, bringing your chest to the floor between your knees.
4. Extend your arms to the front of your mat or bring them alongside your body.
5. Rest your forehead on the floor.
6. Take five to ten deep breaths.

Thread the Needle Pose (Urdhva Mukha Pasasana)
Sanskrit Meaning: Urdhva (Upward) Mukha (Facing) Pasa (Noose) Asana (Pose)
Yoga Level: Beginner
Pose Type: Kneeling
Why This Pose: Releases shoulder and neck tension
Step-by-Step Instructions:
1. Begin on your hands and knees.
2. Thread your right hand under your left arm, lowering your right shoulder and the right side of your head to the floor.
3. After several breaths, switch sides.
 Featured Yoga Mat: Liforme Classic Yoga Mat in Green
Eye of the Needle Pose (Sucirandhrasana)
Sanskrit Meaning: Suci (Needle) Randra (Opening) Asana (Pose)
Yoga Level: Beginner
Pose Type: Supine
Why This Pose: A gentle hip stretch
Step-by-Step Instructions:
1. Lie on your back with your knees pointing up and your soles on the floor.
2. Take your right ankle to the top of your left thigh, close to the knee.
3. Lift your left foot off the floor and draw your left thigh closer to your chest.
4. Hold onto the back of your left thigh.
5. After several breaths, switch sides.
Benefits of Yoga for Climbers
-
Hip mobility
Many climbing moves and holds require open hips. Yoga helps introduce this mobility while also building strength for stability.
-
Hamstring flexibility
The more range your hamstrings have, the bigger you can step and stretch.
-
Core strength
Without a stable core, falling becomes more likely. Core strength is your anchor.
-
Stretching the shoulders, chest, and forearms
Your upper body is constantly in a tensed position when you are climbing. Releasing that tightness is super important. -
Breath control
Yoga teaches you to use your breath to control your nervous system’s response to stressful situations, like looking for your next hold. -
Body awareness
One of yoga’s greatest and most unsung gifts is an improvement in body awareness, which means knowing where your body is in space and how to move it for a specific effect, which is a big advantage when climbing,
Tips for Practicing Yoga as a Climber
Be Consistent
Doing a little yoga here and there is not bad, but it’s also not the way to unlock all yoga’s potential. A weekly session is good; twice a week is better.
Go With the Flow
In led yoga classes, you don’t have to plan your next move, because the teacher does it for you. This is a great opportunity to relax your mind and be in the present moment, which can benefit your climbing and your daily life.
Rock On
If the crag hates to see you coming, you’ve got to start dropping in to your local yoga studio to improve your mobility, help prevent injuries, relieve tightness, and get out of your head. You’ll soon see why yoga is so popular in the climbing community!
FAQs About Yoga for Climbers
Is yoga good for climbers?
Yes, yoga is a great complement to climbing because it focuses on whole-body strength and flexibility while also improving body awareness and stress response.
Which yoga poses are best for climbers?
Probably hip openers, but truly a well-rounded practice that includes many types of poses is best.
Should climbers do yoga before or after a session?
Recovery poses are great for after climbing. Other types of poses can be done before a session or independently when you have more time.
Can yoga help prevent climbing injuries?
Strengthening your core and back are good ways to prevent injuries, as well as stretching tight areas.
How often should climbers practice yoga?
Try for once or twice a week. Consistency is the key.
Can yoga help with sore forearms and tight fingers?
Yoga can definitely help with achy forearms. Fingers are a little more difficult to access.
Do climbers need to be flexible?
It helps! If you can comfortably stretch further, you can extend your reach.
Do I need any yoga experience to get started?
Not at all! See our Beginner’s Guide for all kinds of useful info!