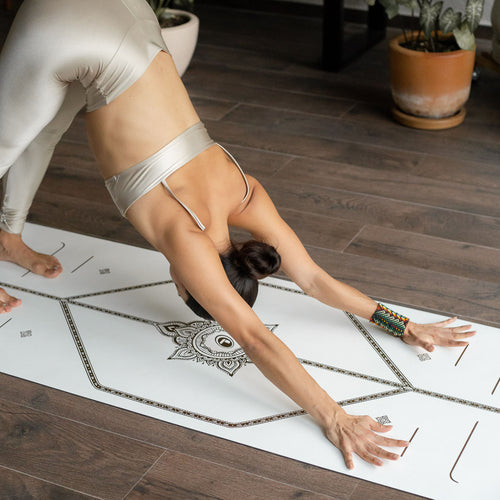
A pain in your gut can be a real pain in the butt. If you have occasional difficulties getting things moving, try yoga for digestion. Any practice that helps you relax can make a big difference, especially if you include poses that mobilize your abdomen.
The Best Yoga Poses for Digestion

Puppy Pose (Uttana Shishosana)
Sanskrit Meaning: Uttana (Intense) Shisho (Puppy) Asana (Pose)
Yoga Level: Beginner
Pose Type: Kneeling
Benefits: Stretches the abdominal muscles, back, and shoulders.
Precautions: Avoid this pose if you have a shoulder injury.
Why this Pose: We’re going to do a lot of abdominal compression, but some expansion is also a good idea.
Step-by-Step Instructions:
- Come to your hands and knees, taking a yoga pad under your knees if they are sensitive.
- Keeping your hips over your knees, slide your hands forward as far as you can with straight arms.
- Lower your forehead or your chin to the floor or a block for support.
- Stay for five to ten breaths.

Cat-Cow Stretch (Marjaryasana-Bitilasana)
Sanskrit Meaning: Marjary (Cat) Bitil (Cow) Asana (Pose)
Yoga Level: Beginner
Pose Type: Kneeling
Benefits: Strengthens and stretches the core and back muscles.
Why this Pose: Moving back and forth between spinal extension and flexion necessitates the expansion and contraction of the abdominal cavity.
Step-by-Step Instructions:
- Begin on your hands and knees with your wrists under your shoulders and your knees under your hips.
- On an inhalation of breath, tip your pelvis forward so that your tail lifts and your belly curves toward the floor.
- Lift your head and pull your navel in gently. On the exhale, tuck your tail so that your spine rounds up toward the ceiling.
- Drop your head and hug your navel toward your spine.
- Repeat this cycle of movement on every inhale and exhale for ten or more breaths.

Half Lord of the Fishes Pose (Ardha Matsyendrasana)
Also Known As: Seated Spinal Twist
Sanskrit Meaning: Ardha (Half) Matsyendra (Lord of the Fishes) Asana (Pose)
Yoga Level: Beginner
Pose Type: Seated
Benefits: Stretches and strengthens the abdominal muscles. Stretches the hips and glutes.
Why this Pose: A twist with compression can encourage motility in your digestive organs.
Step-by-Step Instructions:
- Sit on your mat in a comfortable cross-legged position.
- Take your right foot to the outside of your left thigh with the right knee pointing up.
- Your right knee will move toward the centre line, while your left foot is tucked up near your right buttock.
- On an inhalation, lengthen your spine.
- On an exhalation, twist your torso to the right, taking your left upper arm outside your right thigh and your right hand to the mat at the base of your spine.
- Lengthen your spine on every inhale and deepen your twist on every exhale.
- After five or more breaths, switch sides.

Wind Relieving Pose (Pavanamuktasana)
Sanskrit Meaning: Pavana (Wind) Mukta (Liberating) Asana (Pose)
Yoga Level: Beginner
Pose Type: Supine
Benefits: Compresses the abdominal organs.
Why this Pose: It’s all in the name!
Step-by-Step Instructions:
- Lie on your back
- Draw your knees into your chest.
- Hug your knees in strongly with your arms.
- Lift your forehead toward your knees or keep your head on the floor.
- Some people prefer to hug the knees one at a time with the opposite leg extended.

Bridge Pose (Setu Bandhasana)
Sanskrit Meaning: Setu (Bridge) Bandha (Lock) Asana (Pose)
Yoga Level: Beginner
Type of Pose: Supine Backbend
Benefits: Strengthens the hamstrings, glutes, and quads. Opens the chest, abdomen, and shoulders.
Precautions: Avoid this pose if you have a neck injury.
Why this Pose: Another way to make space in the abdomen.
Step-by-Step Instructions:
- Lie on your back with your legs bent, knees pointing upwards, and arms alongside your body.
- On an inhalation, press into your feet to lift your hips off the floor.
- Tuck your shoulders under one at a time.
- Interlace your fingers behind your back.
- Press into your feet and upper arms to lift the hips higher.
- Take several rounds of breaths and release on an exhalation.

Garland Pose (Malasana)
Sanskrit Meaning: Mala (Garland) Asana (Pose)
Yoga Level: Beginner
Pose Type: Standing
Benefits: Stretches and strengthens the feet, ankles, knees, and hips.
Why this Pose: The compression in this position encourages things to move through your system.
Step-by-Step Instructions:
- Stand with your feet under your shoulders and your toes turned out.
- Bend your knees and lower your butt almost all the way to the floor.
- Take your feet wider apart if necessary.
- If your heels come off the floor, take a rolled blanket under them so they can ground into something.
- Bring your elbows inside your knees and gently push the knees wider.
- Take your palms to Anjali mudra at your heart.

Revolved Low Lunge
Yoga Level: Beginner
Pose Type: Standing
Benefits: Strengthens the legs and arms, opens the chest, and supports digestion through abdominal compression.
Why this Pose: A standing twist is another way to mobilize the digestive organs.
Step-by-Step Instructions:
- Begin in a low lunge position with both hands at the front of your mat, your right foot inside your right hand, and your left foot at the back of your mat, toes tucked under.
- Take your right arm up to the ceiling, opening your chest to the right.
- Stack your right shoulder over your left shoulder.
- Keep your right knee over your right ankle.
- Turn your gaze toward the ceiling.
- After several rounds of breath, switch sides.

Standing Forward Fold (Uttanasana)
Sanskrit Meaning: Uttana (Intense) Asana (Pose)
Yoga Level: Beginner
Pose Type: Standing
Benefits: Stretches the backs of your legs.
Why this Pose: A standing forward fold that uses gravity to deepen the compression.
Step-by-Step Instructions:
- Stand at the front of your mat with your feet hip’s distance apart.
- Inhale and take your arms overhead.
- Exhale and forward fold over your legs, taking your hands toward the floor.
- Bend your knees slightly to allow yourself to forward fold more deeply.
- Let your head and arms hang heavy.
- Stay for five to ten breaths.

Revolved Wide Legged Forward Fold (Parivrtta Prasarita Padottanasana)
Sanskrit Meaning: Parivrtta (Revolved) Prasarita (Stretched Out) Pada (Feet) Uttana (Intense) Asana (Pose)
Yoga Level: Beginner
Pose Type: Standing
Benefits: Stretches the inner legs, hips, glutes, and groins.
Why this Pose: A forward fold with a twist combines several compression methods.
Step-by-Step Instructions:
- Come to stand facing the long side of your yoga mat with your feet wide apart and parallel.
- Forward fold by tipping your pelvis forward, bringing your hands to the floor or blocks.
- Take your right hand to the outside of your left leg, somewhere between the knee and the ankle.
- Take your left hand to your sacrum.
- Revolve your torso to the left, using your grip on your left leg as leverage to deepen the twist.
- Return to the centre and repeat on the other side.

Cobra (Bhujangasana)
Sanskrit Meaning: Bhuja (Cobra) Asana (Pose)
Yoga Level: Beginner
Pose Type: Prone
Benefits: Strengthens the back muscles.
Why this Pose: Light pressure on the abdomen can relieve constipation.
Step-by-Step Instructions:
- Lie down on your stomach with your elbows bent and palms under your shoulders.
- On an inhalation, press into your pelvis and the tops of your feet to lift your chest away from the floor. Try not to press into your hands.
- On your exhalation, release your chest to the floor.
- Repeat this twice more.

Locust Pose (Salabhasana)
Sanskrit Meaning: Salabha (Locust) Asana (Pose)
Yoga Level: Intermediate
Pose Type: Prone
Benefits: Strengthens your back, legs, and abdomen. Improves spinal flexibility.
Why this Pose: A little more intense pressure where your belly meets the floor.
Step-by-Step Instructions:
- Lie on your stomach with your arms by your sides.
- On an inhalation, ground through your pelvis and the tops of your feet and lift your chest and arms off the floor any amount.
- Hold for several breaths and release on an exhalation.
- Come up two more times, also lifting your feet if you want to.

Legs Up the Wall Pose (Viparita Karani)
Sanskrit Meaning: Viparita (Inversion) Karani (to do) Asana (Pose)
Yoga Level: Beginner
Pose Type: Inversion
Benefits: Improves circulation and lymphatic drainage, stretches the backs of the legs.
Precautions: Avoid inversions if you have glaucoma.
Why this Pose: A mild inversion brings your digestive organs into a new position. Lift your hips by using a prop to intensify the inversion.
Step-by-Step Instructions:
- Bring your yoga mat and a bolster, blankets, or a block over to the wall.
- If you have a bolster or blankets, put them at the end of your mat against the wall.
- Sit on your prop with your knees bent and the side of your body against the wall.
- Roll onto your back, taking your legs up the wall.
- If you are using a block as a prop, lift your hips and slide it under.
- Take your hands onto your belly, close your eyes, and relax for several minutes.
- To come out, bend your knees and roll to one side.

Corpse Pose (Savasana)
Sanskrit Meaning: Sava (Corpse) Asana (Pose)
Yoga Level: Beginner
Pose Type: Supine
Benefits: Rests the body.
Why this Pose: Making time for rest reduces stress and gives your body the opportunity to experience the effects of your practice.
Step-by-Step Instructions:
- Lie down on your back with your arms alongside your body.
- Close your eyes.
- Turn your palms to face the ceiling.
- Let your feet fall open.
- Rest for about 10 minutes.
Benefits of Yoga for Digestion
Let’s admit it: ‘digestion’ is a euphemism for a broad range of issues related to excreting waste, including constipation, flatulence, cramping, and bloating. All of these are related to what you eat, so if you have chronic issues, you’re also going to want to look at your diet and talk to healthcare specialists.
In addition to diet, a lot of digestive problems are caused by stress, which means doing yoga regularly can really help.
Reduces Stress
You’re probably aware of the ‘fight or flight' reaction triggered by stress hormones. The opposite of ‘fight or flight’ is ‘rest and digest’. When your nervous system receives signals that you are safe, it tells your body to get back to the business of digesting food. Relaxation techniques like stretching and deep breathing reassure your body that everything is ok.
Supports Natural Elimination
When you need to move things along, try practising yoga postures that target your abdomen, where your digestive organs live. Twists are particularly good at bringing your organs into different positions, which can encourage them to get on with their jobs. Forward folds, which create gentle compression, can also help, particularly when combined with poses that lengthen the torso.
Precautions of Yoga for Digestion
- Avoid immediately after eating, as practicing yoga on a full stomach can actually make discomfort worse. Wait at least 2–3 hours after a meal before trying strong twists, forward folds, or abdominal compression. Gentle restorative poses may be okay sooner.
- Be careful with abdominal conditions or if you have recently had abdominal surgery. Avoid strong twists and deep compressions unless cleared by a healthcare professional.
Rest and Digest
For best results, drink lots of water and include some of the above poses in your regularly scheduled yoga routine, because consistent practice over time is the best way to reduce stress and stay healthy.
FAQs About Yoga for Digestion
Which yoga poses are best for digestion?
Twists (like Ardha Matsyendrasana), forward folds (like Uttanasana), and compression poses (like Pavanamuktasana) are especially effective.
Can yoga relieve bloating and gas?
Yes. Poses that compress the abdomen, like Wind-Relieving Pose or Malasana, can ease bloating and encourage elimination.
When should I practice yoga for digestion?
Wait at least 2–3 hours after eating before doing strong poses. Gentle stretches and restorative poses can be done sooner.
Is yoga good for constipation?
Yes. Regular practice of abdominal compression poses combined with deep breathing can help relieve constipation naturally.
How often should I do yoga for digestion?
Consistency is key. Aim for a short daily practice or a few times per week to support your digestive system.


