Plankenpose ist eine Position, die vielen Menschen bekannt ist und in vielen verschiedenen Bewegungspraktiken verwendet wird. Wenn Sie beispielsweise jemals einen Liegestütz gemacht haben, haben Sie eine Planke gemacht.
Der Yoga -Ansatz achtet genau auf Ausrichtung Um sicherzustellen, dass Sie diese Haltung im Laufe der Zeit häufig und sicher ausführen können. Möglicherweise stellen Sie auch fest, dass Sie die Haltung länger und mit größerem Komfort halten können, wenn Sie die Ausrichtung priorisieren.
Basics der Planke Pose
Sanskrit Bedeutung: Phalaka (Planke) Asana (Pose)
Yoga -Ebene: Anfänger
Pose -Typ: Armstütze
Vorteile:
• Stärken Sie Ihren Kern
• Verbessert Ihr Gleichgewicht
• Verbessert die Armstärke

Wichtige Ausrichtungs -Hinweise
1. Schultern über Handgelenken
Stapeln Sie Ihre Gelenke für die größte Stabilität.
Ausnahme!: Wenn Sie sich auf niedrigere bis zu einem abzüsten vorbereiten Chaturanga Dandasanaverschieben Sie Ihre Schultern nach vorne. Sehen Sie unsere Vinyasa -Sequenz Anweisungen für alle Details.
2. Gerade Linie von Kopf zu Heels
Mit anderen Worten, lassen Sie Ihren Hintern nicht fallen oder kleben. Schauen Sie in einen Spiegel, wenn Sie sich nicht sicher sind.
3. Drücken Sie in Ihre Finger
Dadurch werden Ihre Handflächen leicht gekostet und entlasten etwas Druck von Ihren Handgelenken.
Schritt-für-Schritt-Anweisungen für die Plankenpose
1. Beginnen Sie mit den Händen und Knien mit Ihren Schultern über Ihren Handgelenken.
2. Einer Zeit nacheinander, heben Sie Ihre Knie an und glätten Sie Ihre Beine in Richtung der hinteren Matte auf die Kugeln Ihrer Füße.
3. Stellen Sie sicher, dass Ihre Schultern immer noch über Ihren Handgelenken sind.
4. Drücken Sie in Ihre Hände, um Platz zwischen Ihren Schulterblättern zu schaffen.
5. Falten Sie Ihren Bauch fest, indem Sie Ihren Nabel leicht einziehen.
6. Halten Sie Ihren Hals lang und Ihren Blick auf den Boden.
Anfängerspitzen für die Plankenpose
- Wenn Sie das Gefühl haben, dass Ihr Hintern anfängt zu fallen, senken Sie Ihre Knie auf den Boden.
- Wenn die Planke Ihre Handgelenke verletzt, tiefer zu Ihren Unterarmen.
Variationen

Knie zur Nase
1. Drücken Sie von der Planke in Ihre Handflächen, um Ihren Rücken zu kuscheln
2. Lassen Sie Ihren Kopf fallen und zeichnen Sie Ihr rechtes Knie in Ihre Nase.
3. Wiederholen Sie auf beiden Seiten.

Knie zum Ellbogen
1. Biegen Sie von der Planke aus Ihrem rechten Knie und ziehen Sie es an die Außenseite Ihres rechten Ellbogens oder Oberarms. Versuchen Sie, Kontakt zwischen Knie und Arm aufzunehmen.
2. Halten Sie Ihre Schultern über Ihren Handgelenken und Ihren Kopf hoch.
3. Wiederholen Sie auf beiden Seiten.
Vorbereitungspose

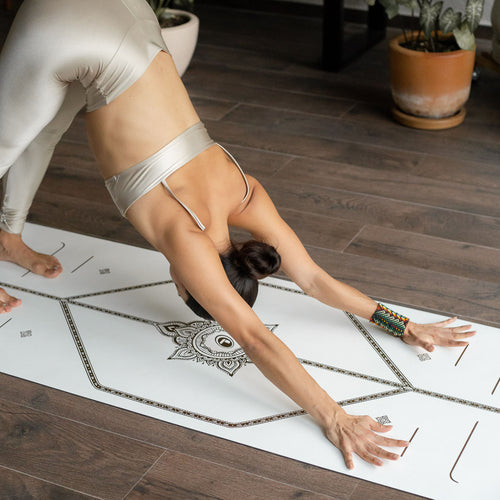
Abwärtsgerichtete Hund
Der nach unten gerichtete Hund ist eine gute vorbereitende Dehnung für die Beine und Schultern. Ihre Hände und Füße sollten an denselben Stellen bleiben, wenn Sie nach vorne in die Plankenpose wechseln.
Gegenstellung

Brückenpose
Ein Herzöffner wie Brückenpose kehrt die Position der Schulterblätter in Plankenpose um.
Warum wir Plankenpose üben
Starke Bauchmuskeln sind für viele Yoga -Posen von wesentlicher Bedeutung, einschließlich Armbilanzen, Stehbilanzen und Inversionen. Die Kernstärke ist auch von der Matte für die sportliche Leistung äußerst vorteilhaft. Gleichgewichtund gesundes Altern. Bretter sind eine erstaunliche Möglichkeit, Ihre Bauchkraft zu verbessern.


