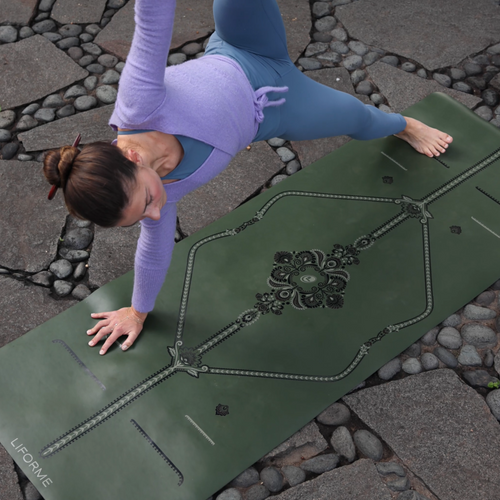
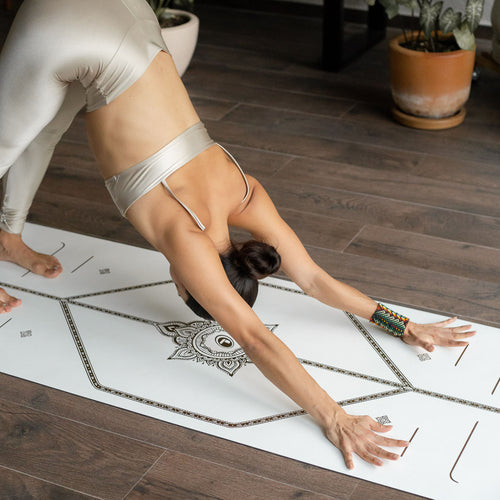
Standing Poses are the heart of Vinyasa Flow Yoga, creating the rhythm and generating the heat of the practice. While some sequences are classics (Sun Salutations, for instance), the beauty of Flow is the infinite ways that poses can be combined. Each original sequence or creative transition challenges your body in new ways and keeps the practice fresh and fun.
A standing pose is generally defined as any posture where most of your weight is on your feet. We’ve included a few poses where your hands are also on the floor, but the legs are doing most of the work. Standing balances require you to stand on one leg at a time while revolved poses include a twist.
Standing Poses Alignment Tips
Standing poses are built from the ground up, starting with the alignment of your feet, stacking your joints, and positioning your pelvis, which can be either facing forward, as in Mountain Pose, or open to the side, as in Warrior II.
If finding the orientation of your pelvis is new to you, read our full guide, Closed Vs. Open Hips: A Yoga Primer, for a deeper look and some body awareness exercises.
Classic Standing Poses

Mountain Pose (Tadasasana)
Sanskrit Meaning: Tada (Mountain) Asana (Pose)
Yoga Level: Beginner
Benefits: Establishes basic standing alignment and improves body awareness.
Step-by-Step:
1. Come to stand at the front of your mat with your feet parallel.
2. Put your hands on your hips and feel that your pelvis is pointing forward.
3. Stack your pelvis over your ankles.
4. Release your arms by your sides with the palms turned forward and stack your shoulder girdle over your pelvis.
5. Let your neck be the natural extension of your spine so your head is in a neutral position.
6. This alignment is the basis for all standing poses in which the pelvis is facing the front of the mat.

Raised Hands Pose (Urdhva Hastasana)
Sanskrit Meaning: Urdhva (Upwards) Hasta (Hand) Asana (Pose)
Yoga Level: Beginner
Benefits: A wonderful stretch for the abdomen, back, shoulders, and arms.
Step-by-Step:
1. From Mountain Pose, inhale to take your arms out to the side and up towards the ceiling.
2. You can bring your palms to touch overhead or keep the palms facing each other at shoulder width apart.
3. Lift your gaze up to your thumbs.

Standing Forward Fold Pose (Uttanasana)
Sanskrit Meaning: Uttanana (Intense Stretch) Asana (Pose)
Yoga Level: Beginner
Benefits: Opens the hamstrings, glutes, and back muscles.
Step-by-Step:
1. From Raised Hands Pose, exhale to release your arms as you swan dive over your legs while tipping your pelvis forward.
2. Bring your fingertips to the floor or your ankles.
3. Release your head.
Chair Pose (Utkatasana)
Sanskrit Meaning: Utkata (Powerful) Asana (Pose)
Yoga Level: Beginner
Benefits: Strengthens your thighs. Stretches your back and shoulders.
Step-by-Step:
1. From Mountain Pose, bend your knees forward to bring your butt back as if you were about to sit in a chair.
2. Glance down at your knees and make sure you can see your toes peeking out from underneath.
3. Lift your arms to align with the diagonal of your torso.

Downward Facing Dog Pose (Adho Mukha Svanasana)
Sanskrit Meaning: Adho (Downward) Mukha (Face) Svana (Dog) Asana (Pose)
Yoga Level: Beginner
Benefits: Improves core, leg, and arm strength. Opens the backs of your legs and back muscles.
Step-by-Step:
1. Begin in a hands-and-knees position.
2. Curl your toes under. On an exhalation, press into your palms to lift your butt toward the ceiling and straighten your legs.
3. Your body is in the shape of an inverted V.
4. Continue pressing into your palms and releasing your heels toward the floor.
5. Let your head hang heavy.

Warrior I Pose (Virabhadrasana I)
Sanskrit Meaning: Virabhadra (a Hindu warrior) Asana (Pose)
Yoga Level: Beginner
Benefits: Strengthens the legs and core. Improves awareness of hip alignment.
Props: use the 45° Lines on your Align-For-Me system to help set up your feet correctly.
Step-by-Step:
1. From Downward Facing Dog, step your right foot forward to the inside of your right hand.
2. Pivot on the ball of your left foot to release your left heel to the mat at a 45-degree angle.
3. On an inhalation, lift your hands away from the mat to bring your torso up to a standing position.
4. Readjust your feet toward either side of your mat for greater stability and to allow your pelvis to point forward as it would in Mountain Pose.
5. Bend your right knee over your right ankle and inhale to lift your arms overhead.
6. Bring your palms to touch or keep your hands shoulder distance apart with the palms facing each other.
7. Take your gaze up toward your thumbs.

Humble Warrior Pose
Also Known As: Devotional Warrior Pose
Yoga Level: Intermediate
Benefits: Improves leg and core strength. Opens the shoulder and back muscles.
Step-by-Step:
1. From Warrior I, interlace your hands behind your back and draw your knuckles down, straightening your arms.
2. Forward fold to the inside of your right foot taking your clasped hands up toward the ceiling.
3. Keep hugging your head towards the midline to maintain Warrior I position of the hips and legs.

Pyramid Pose (Parsvottanasana)
Sanskrit Meaning: Parsva (Side) Uttana (Intense Stretch) Asana (Pose)
Yoga Level: Beginner
Benefits: A stretch for the hamstrings and back.
Props: Blocks are helpful if your hands don’t comfortably reach the floor in a forward fold.
Step-by-Step:
1. From Warrior I Pose, straighten your right leg, and step your left foot forward 10 to 12 inches keeping the 45-degree turn out of the left toes.
2. Put your hands on your hips to check that they are facing forward in Mountain Pose position.
3. On an exhalation of breath, keep your spine long as you forward fold over your right leg.
4. Keep your right knee slightly softened to prevent hyperextension.
5. Bring your hands to the floor or blocks on either side of your right foot.
6. Continue to lengthen your spine on your inhales and deepen your forward fold on your exhales.

High Lunge Pose
Yoga Level: Beginner
Benefits: Strengthens your legs and core. Improves balance.
Step-by-Step:
1. From Downward Facing Dog, step your right foot to the inside of your right hand.
2. On an inhalation, lift your torso toward the ceiling with your arms raised and your right knee bent over your right ankle.
3. Bring your right thigh parallel to the floor and slide your shoulders down your back.

Warrior III Pose (Virabhadrasana III)
Sanskrit Meaning: Virabhadra (a Hindu warrior) Asana (Pose)
Yoga Level: Intermediate
Benefits: Strengthens the legs and core. Improves balance and body awareness.
Step-by-Step:
1. From Warrior I with your right foot forward, come up onto the ball of your left foot.
2. Lean your torso forward and push off your left foot to lift it away from the floor and take your weight into your right leg,
3. Put your hands on your hips to make sure that they are level and facing forward as you lift your left leg towards parallel to the floor. Flex strongly into your left foot.
4. Take your arms alongside your ears so there is a straight line from your fingertips to your heel.

Warrior II Pose (Virabhadrasana II)
Sanskrit Meaning: Virabhadra (a Hindu warrior) Asana (Pose)
Yoga Level: Beginner
Benefits: Strengthens the arms, legs, and core. Improves balance and awareness of open hip alignment.
Step-by-Step:
1. From Warrior I with the right foot forward, turn your left toes out so your left foot is perpendicular to the Central Line.
2. Move your front right foot to the Central Line and open your hips and shoulders to the left.
3. Bend your right knee over your right ankle. You may need to scoot your left foot back a little bit.
4. Your pelvis and chest will face the left side of your mat.
5. Bring your arms parallel to the floor with the right arm forward and the left arm back.
6. Take your gaze out over your right fingertips.

Reverse Warrior Pose
Also Known As: Peaceful Warrior Pose
Yoga Level: Beginner
Benefits: Strengthen your legs. Elongates your side body and intercostal muscles.
Step-by-Step:
1. From Warrior II with the right foot forward, inhale and lift your right arm alongside your right ear.
2. Extend your spine to reach your left hand down the back of your left leg and take a backbend towards the back of the room.
3. Make sure your right knee stays over your right ankle.

Extended Side Angle Pose (Utthita Parsvakonasana)
Sanskrit Meaning: Utthita (Extended) Parsva (Side) Kona (Angle) Asana (Pose)
Yoga Level: Beginner
Benefits: Strengthens your legs and core. Opens your hips, shoulders, and back.
Props: A block inside your front foot can allow you to open your chest more fully.
Step-by-Step:
1. From Warrior II, reach your right hand forward and place your palm inside of your right foot
2. Use the traction between your right shoulder and right knee to open your chest toward the ceiling.
3. If you can't open the chest comfortably, take a block under your right hand or take the right forearm to the top of your right thigh instead.
4. Lift your left arm and your gaze toward the ceiling.
5. Keep your right knee over your right ankle throughout.
6. Lower your left arm over your left ear if you want.

Triangle Pose (Trikonasana)
Sanskrit Meaning: Trikona (Triangle) Asana (Pose)
Yoga Level: Beginner
Benefits: Opens your hamstrings, chest, and sides.
Props: A block under the lower hand can be helpful.
Step-by-Step:
1. From Warrior II with the right foot forward, straighten your right leg.
2. Draw your right arm forward as much as possible, deepening your right hip crease.
3. Lower your right hand to your right ankle, shin, or a block placed inside or outside your right leg.
4. Stack your left arm over your right arm and turn your chest and your gaze toward the ceiling.

Half Moon Pose (Ardha Chandrasana)
Sanskrit Meaning: Ardha (Half) Chandra (Moon) Asana (Pose)
Yoga Level: Intermediate
Benefits: Improves balance and leg strength. Opens your hamstrings and chest.
Props: A block under your lower hand can improve your alignment.
Step-by-Step:
1. From Warrior II, lower your right hand to the outside of your right foot.
2. Keeping your right knee soft, lift your left foot off the floor and move your right hand forward 8 to 12 inches.
3. Stack your pelvis over your right foot and straighten your right leg.
4. Kick strongly out the heel of your straight left leg and make sure your pelvis is oriented towards the side of your mat in a Warrior II position.
5. Open your left arm and chest toward the ceiling and take your gaze up to your left fingertips.
Standing Balances

Tree Pose (Vrksasana)
Sanskrit Meaning: Vrksa (Tree) Asana (Pose)
Yoga Level: Beginner
Benefits: Improves leg strength and balance.
Step-by-Step:
1. From Mountain Pose, shift your weight into your right leg while keeping your pelvis pointing forward.
2. Lift your left foot away from the floor and place the sole of the left foot inside your right thigh.
3. Press your foot into your thigh and your thigh back into your foot to keep your pelvis in the same forward-facing position as Mountain Pose.
4. On an inhalation, lift your arms and your gaze toward the ceiling.

Half Lotus Tree Pose (Ardha Padmasana Vrksasana)
Sanskrit Meaning: Ardha (Half) Padma (Lotus) Vrksa (Tree) Asana (Pose)
Yoga Level: Intermediate
Benefits: Improves leg strength and balance. Hip opener.
Step-by-Step:
1. From Tree Pose, slide the top of your left foot into your right hip crease in Half Lotus position.
2. Your left knee points towards the floor as you press your left foot into your right leg.

Eagle Pose (Garudasana)
Sanskrit Meaning: Garuda (Eagle) Asana (Pose)
Yoga Level: Intermediate
Benefits: Improves balance and pelvic alignment awareness. Stretches the upper back and shoulders.
Step-by-Step:
1. From Chair Pose, take your weight into your right leg.
2. Lift your left foot off the floor and wrap your left thigh over your right thigh.
3. Hook your left foot behind your right calf.
4. Keep your pelvis in a forward-facing Mountain Pose position.
5. Take your left arm under your right arm. Bend both elbows and wrap your left palm around your right forearm so that your palms touch.
6. Lift your upper arms parallel to the floor while sliding your shoulders down your back.

King Dancer Pose (Natarajasana)
Sanskrit Meaning: Nataraja (King of the Dance) Asana (Pose)
Yoga Level: Intermediate
Benefits: Improves leg and core strength. Opens the shoulders and chest.
Step-by-Step:
1. From Mountain Pose, take your weight into your right leg.
2. Lift your left foot off the floor and bend your left knee so that your left foot comes close to your left buttock.
3. Reach your left hand back and hold the outside of your left foot with your thumb pointing down.
4. Take your right arm up towards the ceiling.
5. Begin to rotate your pelvis forward so your upper body comes forward and your left thigh comes toward the ceiling.
6. Press your left foot into your left hand to continue opening your chest and taking your left knee higher.

One-Legged Chair Pose (Eka Pada Utkatasana)
Sanskrit Meaning: Eka (One) Pada (Foot) Utkata (Powerful) Asana (Pose)
Yoga Level: Intermediate
Benefits: Gentle hip opener and balance challenge. Builds leg strength.
Step-by-Step:
1. From Chair Pose, transfer your weight into your right leg without moving your pelvis.
2. Lift your left foot off the floor and bring your left ankle to the top of your right thigh with your left knee pointing left.
3. Flex your left foot strongly.
4. Take your hands to heart centre or overhead.
5. Maintain Chair Pose position in your right leg.

Sugarcane Pose (Ardha Chandra Chapasana)
Sanskrit Meaning: Ardha (Half) Chandra (Moon) Chapa (Bow) Asana (Pose)
Yoga Level: Intermediate
Benefits: Increases the balance challenge and adds a quad stretch to Ardha Chandrasana.
Props: Use a block under your hand if you do in Half Moon Pose.
Step-by-Step:
1. From Half Moon Pose, bend your left lifted knee, bringing your left heel close to your left buttock.
2. Drop your left arm behind your back and reach your left hand to hold your left ankle.
3. Activate your left foot.
4. Press your left foot into your left hand to bow your chest forward and your left leg back.

Standing Hand to Big Toe Pose B (Utthita Hasta Padangusthasana B)
Sanskrit Meaning: Utthita (Extended) Hasta (Hand) Padangustha (Big Toe) Asana (Pose)
Yoga Level: Intermediate
Benefits: Strengthen your core and legs while stretching your hamstrings.
Step-by-Step:
1. From Mountain Pose, take your weight into your right leg.
2. Lift your left foot off the floor and hug your left knee into your chest.
3. Hold your left big toe with the first two fingers of your left hand
4. Straighten your left leg toward the front of the room.
5. Maintain Mountain Pose posture in your torso and keep your left arm in its socket. Bend your left knee or use a strap around the ball of the foot if that’s necessary to keep good alignment in your upper body.
6. Stay here or open your left leg to the left for the B variation pictured.
Revolved Standing Poses

Revolved Low Lunge
Yoga Level: Beginner
Benefits: A nice twist for the abdomen and back.
Step-by-Step:
1. From Downward Facing Dog. step your right foot to the inside of your right hand.
2. Bend your right knee and stack it over your right ankle.
3. Ground into your left palm and lift your right arm overhead.
4. Rotate your chest and your gaze toward the ceiling.

Revolved Chair (Parivrtta Utkatasana)
Sanskrit Meaning: Parivrtta (Revolved) Utkata (Powerful) Asana (Pose)
Yoga Level: Beginner
Benefits: Improves leg and core strength. Rotates the spine.
Step-by-Step:
1. Begin in Chair Pose with your hands in Anjali Mudra at your sternum.
2. On an exhalation, lift your left elbow and twist from your core to bring your left elbow to the outside of your right knee.
3. Keep your knees bent and your butt low.
4. Press your left upper arm in your right outer thigh to deepen your twist on your exhalations.

Revolved One-Legged Chair (Parivrtta Eka Pada Utkatasana)
Sanskrit Meaning: Parivrtta (Revolved) Eka (One) Pada (Foot) Utkata (Powerful) Asana (Pose)
Yoga Level: Intermediate
Benefits: Combining multiple elements like balance and twisting improves coordination and body awareness.
Step-by-Step:
1. Begin in One-Legged Chair Pose with your right leg as your standing leg and your hands in Anjali Mudra at your sternum.
2. On an exhalation of breath, lift your left elbow and twist from your core to bring your left upper arm to the sole of your left foot, which is on the outside of your right thigh.
3. Keep your right leg bent in Chair Position.
4. Press into your right arm to deepen the twist on your exhalations.

Revolved Half Moon (Parivrtta Ardha Chandrasana)
Sanskrit Meaning: Parivrtta (Revolved) Ardha (Half) Chandra (Moon) Asana (Pose)
Yoga Level: Advanced
Benefits: A balance challenge with a twist works the abdomen and legs.
Props: A block under your hand helps you open your chest.
Step-by-Step:
1. From Downward Facing Dog, step your right foot to the inside of your right hand.
2. Move both your hands forward 10 to 12 inches as you lift your left foot off the floor and bring your weight into your right leg for a standing split at the front of your mat.
3. Keep your pelvis facing the floor as you flex your left foot and bring your left leg parallel to the floor.
4. You may want to take a block under your left hand as you bring your right hand to your right hip.
5. Begin to rotate your chest to face the right side of your mat, stacking your right shoulder on top of your left shoulder as much as possible.
6. Take your right arm and your gaze up toward the ceiling.
Hip Openers

Garland Pose (Malasana)
Sanskrit Meaning: Mala (Garland) Asana (Pose)
Yoga Level: Beginner
Benefits: A deep stretch for the hips counteracts the effects of sitting in a chair.
Props: Use a rolled blanket under your heels if necessary.
Step-by-Step:
1. From Mountain Pose, turn your toes out 45 degrees and separate your feet about 12 inches apart.
2. Bend your knees to come into a deep squat with your butt close to the floor. Adjust your feet further apart if necessary.
3. Make sure that your heels are on the floor so you can ground into them. If your heels are lifted, take a rolled-up blanket under them so you can put weight into your heels.
4. Bring your elbows inside your knees and your hands to your sternum in Anjali Mudra. Use the pressure from your elbows to gently push your knees apart.

Goddess Pose (Utkata Konasana)
Sanskrit Meaning: Utkata (Powerful) Kona (Angle) Asana (Pose)
Also Known As: Horse Pose
Yoga Level: Beginner
Benefits: Opens the hip and groin. Strengthens your feet and legs.
Step-by-Step:
1. Come to face the side of your mat with your legs apart in a wide straddle.
2. Turn your toes out 45 degrees and bend your knees to bring your knees over your ankles. You may need to adjust the distance between your feet.
3. Keep your knees tracked over your toes, working hard to prevent the knees from collapsing inward.
4. Take your hands to Anjali Mudra at your chest or choose another arm position.

Lizard Pose (Utthan Pristhasana)
Sanskrit Meaning: Utthan (Intense) Pristha (Back) Asana (Pose)
Yoga Level: Intermediate
Benefits: Stretches and strengthens your hip flexors, quads, glutes, and hamstrings.
Props: Blocks under your forearms can improve your alignment.
Step-by-Step:
1. From Downward Facing Dog, step your right foot to the outside of your right hand.
2. Lower your elbows to your mat keeping your palms flat and your forearms parallel.
3. You may lower your left knee to your mat or keep the left leg straight and press through the heel.

Side Lunge Pose (Skandasana)
Sanskrit Meaning: Skanda (Hindu deity) Asana (Pose)
Yoga Level: Intermediate
Benefits: Stretches your hamstrings and calves. Strengthens your core, quads, and glutes.
Step-by-Step:
1. Come to face the side of your mat with your legs apart in a wide straddle.
2. Bend your right knee into a deep squat with your butt close to the floor while keeping your left leg extended straight.
3. Flex your left foot and come onto your left heel.
4. Ground into your right heel.
5. Take your right arm inside your right leg and open your left arm and chest toward the ceiling.
Standing Strong
Some people like to practice the same sequence of poses repeatedly, while others prefer to mix it up. With so many poses to work with, you can create an endless number of different standing sequences and combinations, all of which strengthen your body and ground your awareness in the present moment.


