€ EUR
€ EUR

To be grounded is to feel solid, strong, and balanced in body and mind. Every yoga practice offers an opportunity to root down, creating a firm foundation from which to grow expansive, free, and joyful.
Yoga’s standing poses are best approached from the ground up. Even if they include a fancy arm variation or a deep twist in the upper body, don’t forget that your stability comes from your connection to the Earth. Your alignment begins with your feet, your legs, your hips, your whole stance. Practice these grounding poses any time you feel like your head is getting ahead of your body.
Mountain Pose (Tadasana)
 Featured Yoga Mat: XL Mountain Yoga Mat
Sanskrit Meaning: Tada (Mountain) Asana (Pose)
Yoga Level: Beginner
Pose Type: Standing
Why This Pose: Mountain Pose is an opportunity to root your feet into the ground and establish your stability.
Step-by-Step Instructions:
- Scan your body, starting with the bottoms of your feet.
- With both soles flat on the mat, turn your toes ever so slightly inwards to bring the outer edges of your feet to a parallel position.
- Your big toes may be brought to touch, or you can go for more stability by placing the feet hip-distance apart.
- Spread your toes without gripping them and draw up your arches.
- With a slight bend in the knee to avoid locking the joint, engage your thighs and feel your kneecaps move upwards.
- Gently draw your belly button in toward your spine.
- Stack your shoulders over your hips.
- Turn your palms open to the front to help your shoulder blades stay on your back, but avoid puffing up your chest.
- Let the shoulders relax away from your ears.
- Your neck stays long, and the crown of your head moves the sky.
- Take five to ten breaths to feel your posture and alignment at work.
Chair Pose (Utkatasana)
 Featured Yoga Mat: Liforme Classic Yoga Mat in Blue
Sanskrit Meaning: Utkata (Fierce/Powerful) Asana (Pose)
Yoga Level: Beginner
Pose Type: Standing
Why This Pose: Lowering your hips helps you feel the pull of gravity toward the Earth.
Step-by-Step Instructions:
- To transition to Chair Pose (Utkatasana), bend your knees and let your butt drop back a lot, as if you were lowering yourself into a chair that isn’t there.
- Glance down over your knees to make sure you can see your toes peeking out.
- Make sure that your weight is in your heels by lifting your toes and giving them a little wiggle.
- To counter all this downward movement, lift your arms overhead while keeping your shoulders away from your ears.
- Let your palms face one another and be parallel.
- Think of your body as a lightning bolt grounding down into the earth.
- Stay for five breaths as your thighs begin to burn.
Tree Pose (Vrksasana)
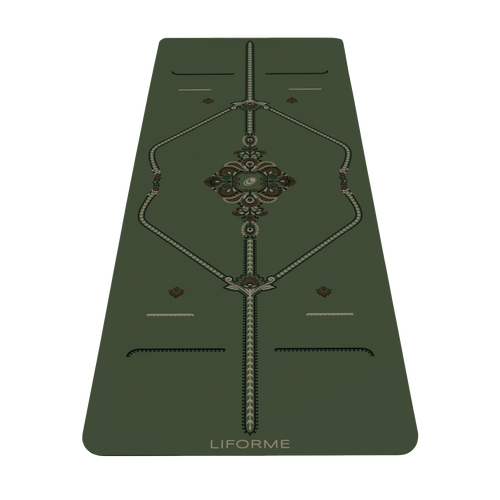
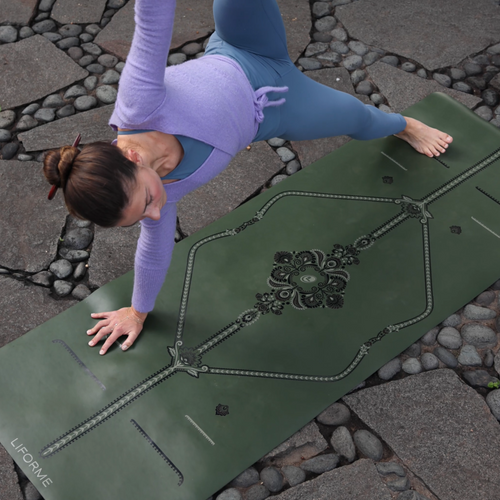
 Featured Yoga Mat: Mindful Garden Yoga Mat in Olive
Sanskrit Meaning: Vrksa (Tree) Asana (Pose)
Yoga Level: Beginner
Pose Type: Standing
Why This Pose: With only one foot on the mat, your connection to the gound becomes even more important.
Step-by-Step Instructions:
- Restraighten your legs, shift your weight into your right foot, and lift your left foot off the floor to come into Tree Pose. You can do this all in one motion or take it in stages if you need more time to establish your balance.
- Ground down into your standing leg and bring the sole of your left foot to your inner right thigh or calf.
- Avoid placing the left foot on the side of your right knee since you don’t want to put pressure on the joint.
- Your left knee should be pointing to the left.
- The force of your left foot tends to shift the hips right. Put your hands on your hips to make sure that they are level.
- Remember your stance in Mountain Pose? Everything is the same in Tree except for the lifted leg.
- Fix your gaze on something slightly in front of you that isn’t moving to help you balance.
- Once you feel stable, you can grow your arms overhead.
- Take three to five breaths, resuming the posture if you fall out.
- Release your left foot to the floor.
- Give both legs a little shake, then repeat the pose standing on your left foot to keep things even.
Pyramid Pose (Parsvottanasana)
 Featured Yoga Mat: Liforme Classic Yoga Mat in Pink
Sanskrit Meaning: Parsva (Side) Uttana (Intense Stretch) Asana (Pose)
Yoga Level: Intermediate
Pose Type: Standing
Why This Pose: The wide, split stance asks both feet to hold their ground while your torso moves forward over the front leg.
Step-by-Step Instructions:
- Step your left foot about halfway down toward the back of your mat to prepare for Pyramid Pose.
- Turn your left toes out from the heel around 45 degrees.
- Your hips are still facing forward in their Mountain Pose position.
- Widen your stance away from the midline to create a more stable base.
- On an exhalation, forward bend over your front leg, keeping a flat back.
- Bring your fingertips to the floor or onto blocks on either side of your right foot.
- Keep a slight bend in your right knee to avoid locking it.
- On your inhalations, lengthen your spine. On your exhalations, deepen your forward fold.
- Five breaths should do nicely.
- Step up to the front of your mat and step your right foot back to do the other side.
Happy Baby (Ananda Balasana)
 Featured Yoga Mat: Liforme Classic Yoga Mat in Olive
Sanskrit Meaning: Ananda (Blissful) Bala (Baby) Asana (Pose)
Yoga Level: Beginner
Pose Type: Supine
Why This Pose: Anchoring your sacrum to the floor while your legs lift makes this pose feel settling.
Step-by-Step Instructions:
- Lie on your back. Bend your knees and stack your ankles over your knees.
- Make sure that your sacrum stays rooted down.
- Pull on the soles of your feet with your hands to move your knees toward your armpits.
- After five to ten breaths, release your legs and arms to the floor.
Corpse Pose (Savasana)

Sanskrit Meaning: Sava (Corpse) Asana (Pose)
Yoga Level: Beginner
Pose Type: Supine
Why This Pose: Feel your body connect to the ground along its full length.
Step-by-Step Instructions:
- Lie down on your back and let your legs separate, with your feet falling open to either side.
- Rest your arms a little away from your body with your palms turned up.
- Place a folded blanket over your thighs or a block on your pelvis if you want more weight.
- Close your eyes and stay for five minutes or longer, letting each part of your body relax.
- Let yourself be heavy, embraced by the Earth as you surrender fully.
Why We Practice Grounding Yoga Poses
Feeling scattered usually shows up in the body before you name it in your head. Grounding poses work in the other direction, building a stable connection to the Earth that travels upward. Come back to this sequence any time you need to feel solid again.
Grounding Yoga Poses FAQs
What are grounding yoga poses?
Grounding poses build a stable connection to the floor, usually through standing shapes that root down through the feet or reclined ones that put more of your body in contact with the ground.
How do grounding yoga poses help you feel less scattered?
Rooting down asks for your attention in your feet, legs, and breath, which pulls your focus out of your head and into something physical you can actually feel.
How long should I hold each grounding pose?
Five to ten breaths is enough in the standing poses and longer in Happy Baby and Savasana.