I piedi sono più di un semplice trucco per la festa: sono un viaggio di forza, equilibrio e attenzione mentale che chiunque può intraprendere. Che tu abbia appena iniziato o cerchi di portare la tua pratica al livello successivo, questa guida ti fornirà i suggerimenti, i trapani e l'incoraggiamento di cui hai bisogno per fare progressi costanti.
I piedi non riguardano solo essere sottosopra; Si tratta della gioia dell'apprendimento, del brivido del superamento delle sfide e della soddisfazione di vedere il tuo duro lavoro ripagare. Ci immeriamo ed esplorate insieme il mondo delle a piedi.
Benefici fisici del verticale
• Forza della parte superiore del corpo migliorata: Impegna i muscoli nelle spalle, alle braccia e alla parte superiore della schiena.
• Stabilizzazione del core: Attiva i muscoli del nucleo profondo, migliorando la stabilità ed equilibrio.
• Equilibrio e coordinamento migliorati: Richiede e migliora la consapevolezza e il controllo complessivi del corpo.
• Aumento della forza e della flessibilità del polso: Rafforza i polsi e migliora la loro gamma di movimento.
• Circolazione migliorata: L'inversione aumenta il flusso sanguigno al cervello e alla parte superiore del corpo.
• Decompressione spinale: Fornisce una leggera trazione alla colonna vertebrale, che può alleviare la pressione.
Benefici mentali delle mani
• Focus e concentrazione migliorate: Richiede chiarezza mentale e presenza per mantenere l'equilibrio.
• Potenziata la fiducia: Padroneggiare una posa impegnativa come una verticale può aumentare l'autostima.
• Sollievo da stress: Le inversioni possono avere un effetto calmante sul sistema nervoso, riducendo lo stress.
• Aumento della consapevolezza del corpo: Aumenta la propriocezione o la consapevolezza della posizione del corpo nello spazio.
• Mindfulness and Meditation: Richiede di essere pienamente presente, che può contribuire alla pratica della consapevolezza.
• Maggiore perseveranza: La pratica regolare delle banche richiede uno sforzo e una determinazione in corso, aiutando a costruire resilienza e la volontà di continuare a provare nonostante le sfide.
• Pazienza migliorata: Il processo di apprendimento e raffinazione dei vermi è graduale, incoraggiando la pazienza poiché il progresso è spesso lento e incrementale.
Perché fanno i vermi?
Il motivo numero uno per fare i vermi è semplice: sono divertenti! Le a mano portano un senso di giocosità e gioia che spesso mancano dalle nostre routine quotidiane. Quando inverti il tuo corpo e l'equilibrio sulle tue mani, è come attingere al tuo bambino interiore, riscoprendo il brivido di fare qualcosa che si sente sia avventuroso che gratificante.
La sfida di bilanciarsi a testa in giù è coinvolgente ed eccitante, rendendo ogni sessione di prove come una mini avventura. Inoltre, il senso di realizzazione quando finalmente inchiodi la verticale è incredibilmente soddisfacente, rafforzando il fattore divertente e farti desiderare di farlo ancora e ancora.
Da dove cominciare
1. PREP POSE E CONSIDIZIO
• Riscaldamento e rafforzamento del polso: Dati i supporti per pressione messi sui polsi, è fondamentale riscaldarli accuratamente. Eseguire gli allungamenti del polso in varie direzioni (flessione, estensione e laterale) e rafforzarli con esercizi come riccioli da polso o push-up di dito.• Mobilità e flessibilità: La mobilità generale e la flessibilità sono essenziali per i vermi. Concentrati su allungamenti del tendine del ginocchio, allungamenti del flessore dell'anca e mobilità spinale Per garantire che il tuo corpo possa muoversi liberamente nella posizione corretta.

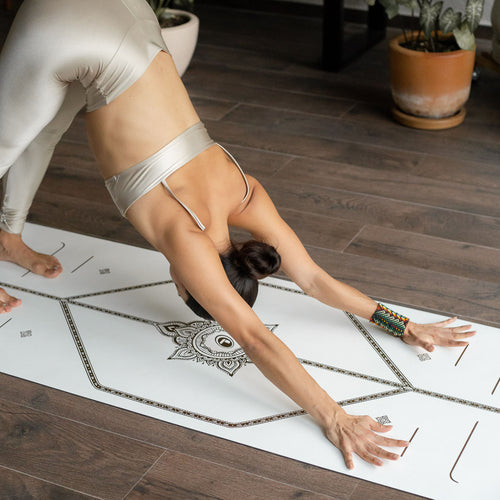
• Cane verso il basso: Inizia con Cane discendente Riscaldare e allungare la colonna vertebrale mentre si apre delicatamente le spalle. Questa posa inizia anche a coinvolgere i muscoli necessari per i vermi.
• Apertura e rafforzamento della spalla: Usa tratti come la flessione della spalla sul pavimento o con una cinghia per aumentare la gamma di movimento. Incorporare esercizi di forza come i rubinetti delle spalle in tavola, flessioni di luci e passeggiate a parete per costruire la resistenza alle spalle necessarie per sostenere il peso corporeo.
2. Esercizi iniziali
• Calci da parete: Inizia imparando a calciare contro un muro. Inizia con i calci a gamba singola per costruire il controllo, quindi progredire verso le voci del salto man mano che ti senti più a tuo agio.
• Tenere contro il muro: Esercitati a tenere i vani per il petto rivolto verso il muro piuttosto che la schiena. Questa posizione incoraggia un migliore allineamento e coinvolgimento del nucleo, rendendo più facile la transizione alle banche autoportanti in seguito. La pratica di ritorno a parete porta spesso a fare un over-arching sulla schiena e fare troppo affidamento sul muro per equilibrio, il che può rallentare i progressi.

• Esercitazioni di allineamento sul pavimento: Lavora su trapani che migliorano il tuo Allineamento della verticale, come sdraiarsi e praticare il corpo vuoto o le variazioni della tavola. Questi trapani aiutano ad aumentare la forza e rafforzare la corretta postura della verticale.
• Timed Holds: Concentrati sul trattenere i vermi contro il muro per aumentare i periodi per costruire la resistenza. Inizia con le prese brevi e estendi gradualmente il tempo man mano che la forza e la fiducia crescono.
3. Usando il muro in modo efficace

• Progressione graduale: Non affrettarsi ad allontanarti dal muro. L'uso del muro per il supporto è uno strumento prezioso per costruire forza, allineamento e fiducia. Tuttavia, più velocemente inizi a incorporare la pratica senza il muro, più velocemente il tuo equilibrio e i piedi indipendenti miglioreranno.

• Pratica senza il muro: Non appena ti senti pronto, inizia a tentare i vermi senza il muro. Inizia con le prese brevi, anche se sono solo per alcuni secondi. Questa pratica ti aiuterà a imparare a controllare il tuo equilibrio senza fare affidamento sul supporto esterno.
• Spotter e allenatori: Ove possibile, esercitati con uno spotter o un allenatore di vermi. Possono fornire assistenza, supporto e feedback, accelerando i tuoi progressi e aiutandoti a evitare cattive abitudini.
Suggerimenti per i principianti che imparano i vermi
1. La coerenza è la chiave: Il fattore più importante nell'apprendimento di avversari è la coerenza. Punta a sessioni di pratica quotidiana più brevi piuttosto che alcune lunghe diffuse nel tempo. La pratica regolare aiuta a costruire la memoria muscolare e consente al tuo corpo di adattarsi alle esigenze dei vermi.
2. Pratica entro i tuoi limiti: È fondamentale ascoltare il tuo corpo e esercitarsi nelle tue attuali capacità. Sovra esprimere te stesso può portare a lesioni o frustrazione. Progressi gradualmente e celebra le piccole vittorie lungo la strada.
3. Registra e rivedi la tua pratica: Video te stesso durante ogni sessione di prove. La revisione dei tuoi video ti aiuta a identificare le aree per il miglioramento e tenere traccia dei tuoi progressi nel tempo. Questo feedback visivo è prezioso per perfezionare la tua tecnica.
4. Lavorare con amici o un allenatore: Praticare con gli amici o un allenatore a mano può fornire supporto, motivazione e preziosi feedback. Possono anche aiutarti a individuarti, rendendo più facile tentare nuove competenze e correggere eventuali errori in modo sicuro.
5. Concentrati prima sulla costruzione della forza: Prima di immergersi negli aspetti tecnici delle prese, dà la priorità alla costruzione della forza necessaria, specialmente nelle spalle, nelle armi e nel nucleo. È difficile concentrarsi sulla tecnica se ritieni che le tue braccia stiano per dare. La forza ti darà la stabilità e il controllo necessari per lavorare su dettagli più fini.
Suggerimenti per i portandista avanzati
1. Concentrati su alcune abilità chiave: Mentre avanza, è importante restringere la tua attenzione. Scegli alcune competenze o tecniche specifiche su cui stai lavorando e impegnati a praticarle ogni giorno per mesi. La ripetizione è la chiave per la padronanza.
2. Padroneggiare una cosa alla volta: Resisti all'impulso di saltare da un'abilità all'altra. Padroneggiare ogni abilità prima di andare avanti. Ciò garantisce una solida base e rende le competenze più complesse più facili da imparare a lungo termine.
3. Aumenta il tempo sulle tue mani: Man mano che diventi più abile, lavora per aumentare la quantità di tempo in cui puoi tenere un verticale. Una volta che ti senti a tuo agio con una particolare abilità, mira a tenerla per 1-2 minuti o più. Questo costruisce resistenza e approfondisce il tuo controllo.
4. Progressi lentamente con i vermi di un braccio: Non precipitarti in un banco di un braccio. Durante la pratica, tieni le dita della mano libera a terra fino a quando non puoi bilanciarsi con loro senza applicare la pressione. Questo approccio graduale aiuta a costruire forza ed equilibrio senza sovraccaricare il tuo corpo.
5. Ottieni un allenatore: Per far avanzare davvero la tua pratica in mano, lavora con un allenatore professionista. Un allenatore può fornire un feedback personalizzato, aiutare a correggere eventuali errori e guidarti attraverso gli aspetti più impegnativi dell'allenamento a mano. La loro competenza può accelerare i tuoi progressi e aiutarti a raggiungere nuove altezze.
Perché amo i vermi!
Adoro i banchi perché sono incredibilmente divertenti, portando un senso di giocosità e avventura alla mia pratica. La sfida di bilanciare il capovolgimento mi tiene coinvolto, mentre il viaggio di padronanza di diverse competenze offre infinite opportunità di crescita.
Mi piace il processo di concentrarmi su tecniche specifiche, costruire la forza e spingere ogni giorno i miei limiti. La coerenza, la pazienza e la perseveranza richieste rendono i piedi non solo un esercizio fisico ma anche mentali. Il senso di realizzazione quando inchiodo un'abilità, tengo un verticale più a lungo o progredisce a un nuovo livello è profondamente soddisfacente. Inoltre, esercitarsi con gli amici aggiunge un elemento collaborativo e di supporto a questa pratica in continua evoluzione.
Hai questo!
Iniziare i banchi o sentirsi bloccati nella tua pratica può essere impegnativo, ma ricorda che ogni maestro di avversario è iniziato esattamente dove ti trovi. I progressi potrebbero sembrare lenti a volte, ma ogni sforzo che fai è costruire forza, equilibrio e fiducia. Celebra le piccole vittorie: ogni calcio, ogni secondo in più, ogni miglioramento dell'allineamento.
La crescita avviene nei dettagli e la coerenza porterà risultati. Sii paziente con te stesso, abbraccia il viaggio e, soprattutto, mantieni il divertimento al centro della tua pratica. Ogni passo avanti, non importa quanto piccolo, è un passo più vicino al raggiungimento dei tuoi obiettivi. Continua: hai questo!


