Yoga is all about finding the balance between flexibility and strength. Though yoga is perhaps better known for its stretchy, bendy, loosey-goosey side, its fierce, powerful, vigorous side is just as important.
Some people come to yoga already quite strong; they usually need to work on their flexibility. The inverse is also true; anyone who is naturally flexible needs to complement their bendiness with strength and stability to minimise the chance of injury.
Brand-new beginners will build both flexibility and strength naturally when they practice a wide variety of poses regularly. Just by practising consistently, new yogis will begin to strengthen their major muscle groups (core, arms, legs, back) plus the many other smaller support muscles you probably didn’t even know were there until you were sore in the strangest places.
Intermediate and advanced students of yoga may want to start targeting specific areas for strengthening as you begin to tackle more complicated poses like inversions and arm balances.
Although it may not be as easy to measure as your newly bulging triceps (thank you, Chaturanga!), the yoga that strengthens our bodies also works on our minds. Though you (probably) won’t be teleporting household objects anytime soon, you will feel the mental effects of a consistent yoga asana practice.
These include learning the power of perseverance, finding a willingness to try new things, dealing with failure followed by success (and then maybe failure again), and discovering that you can have some measure of control over your mind’s frantic activity. The exploration of the physical side of yoga often leads to an interest in mindfulness, but you don’t have to have a formal meditation practice to begin to experience yoga’s mental benefits.
Is Yoga Enough for Strength Training?
This is the kind of question that drives die-hard yogis crazy but, none the less, comes up often enough that it deserves an answer. And our answer is, unequivocally,... it depends.
It depends on a lot of things, like what you mean by ‘enough’, what your strength goals are, and how you want to live your life. If you really want to bulk up, there are more effective ways, namely weight-lifting. Yoga falls under the categories of body-weight training, in which you are necessarily limited in how much you can lift by your own size.
Weightlifting knows no such bounds since you can keep adding plates to your bar until the cows come home. Both types of training build strength when muscles are worked until they are fatigued.
Incorporating many different kinds of movement into our lives makes us stronger and healthier. Cardio activities like running and swimming are great for yoga and yoga is great for them.
Lifting weights and doing additional core work will help you do more strength-based yoga poses and also improve your balance and stamina in your daily life. It’s all related. So, if it makes your body feel good, then you should do it. But try to let go of the idea that you are never doing enough.

Which Type of Yoga Is Best for Building Strength?
Active, dynamic styles of yoga are great for strength training. They can be seen as the equivalent of doing a lot of reps of body-weight exercises.
Ashtanga, with its emphasis on daily practice, many vinyasas, and mastery of postures in sequence is one of the most effective. Many types of Power Yoga, which are based on Ashtanga principles, also live up to their name.
Rocket Yoga is another particularly strong style of practice, as is Jivamukti. Both of these incorporate lots of balancing and inverted postures within fast-paced flows.
That said, styles in which poses are held for a longer duration build muscle endurance. In Iyengar Yoga, for instance, props are used to make it possible to hold difficult poses for much longer than in a flow context.
Forrest Yoga is particularly well-known for its attention to detail and stamina-testing hold times. If you have only ever done fast-paced yoga, you may be surprised at how challenging this is.
Slow-flow provides a nice combination of longer holds with connecting movement. So, if strength is your goal, incorporate both long hold times and more reps.
Plank Pose (Phalakasana)
Planks are an undisputed strengthener for the abdominal muscles, the shoulders, and the lower back. Though planking seems simple enough, you want to make sure that your form is good so that your shoulders stay safe.
It can be hard to judge the position of your hips at first, so if you don’t have a mirror handy, get a friend to tell you if your hips are piking up too high or sagging too low. In yoga classes, Planks are often used as a quick transitional pose. To improve strength, try holding your Planks for at least a minute.

Step-by-Step Instructions:
1. Come to your hands and knees on your yoga mat with your shoulders directly over your wrists. If you were staying here, you would also line up your hips over your knees, but in this case, you want the knees a little further back in preparation for straightening the legs.
2. Tuck your toes under and straighten your legs.
3. Spread your fingers wide to distribute your weight throughout your palms.
4. Avoid locking your elbows since this is hard on your joints. Softening your elbows just a little bit allows the support muscles around the joint to kick in.
5. When the hips are in the correct potions (neither too high nor too low), you can trace a diagonal line from the crown of your head to your heels.
6. If you can’t maintain this form, drop your knees to the floor as you build strength.
Four-Limbed Staff Pose (Chaturanga Dandasana)
Chaturanga flows from Plank like butter on hot toast. Take everything we said about the importance of alignment in Plank and double down on it for Chaturanga. It doesn’t do any good to put so much work into your triceps if your shoulders are going to give out in a few years.
Assuming your alignment is great, you can’t beat Chaturanga when it comes to arm strength, plus shoulders, back, and core as well. It is essentially a mindful push-up, and you can treat it as such.
Instead of one Chaturanga, try doing five in a row, pushing back to Plank each time. You can also hold the low position or add in an extra Chaturanga after your Upward Facing Dog in a classic vinyasa. As with Plank, dropping the knees to the mat is a great option for beginners.

Step-by-Step Instructions:
1. From Plank, shift your weight forward into your toes so that your shoulders come in front of your wrists.
2. Slowly bend your elbows straight back to lower your chest toward the floor.
3. Stop lowering when your shoulders are in line with your elbows or above the elbows. Do not let the shoulders dip toward the floor or come anywhere near to touching the floor!
Cobra Pose (Bhujangasana)
The lowly Low Cobra is much more than just a steppingstone to Upward Facing Dog. It offers the rare opportunity to tap into the underused muscles in your back.
To make the most of Cobra’s strengthening potential, you first have to take a solemn vow not to cheat this pose. When we say that you should lift your chest up as high as possible, all of a sudden people start pressing into their palms and straightening their arms and yes, their chests do come up higher, but they haven’t used their back muscles at all.
So, first reconcile yourself to the idea that your Cobra is going to be pretty low. You are going to keep your elbows bending straight back and not put any pressure into your hands to help you lift up.

Step-by-Step Instructions:
1. Lie on your stomach with your forehead on the mat, your hands under your shoulders, and your elbows hugging your sides.
2. Anchor your pelvis to the mat and, on an inhalation, lift your shoulders and upper chest off the mat without pressing into your hands at all. Slide your shoulders away from your ears and keep your gaze on the floor to avoid cranking your neck.
3. On your next exhalation, lower your forehead back to your mat. Flowing up and down on the breath three to five times helps you tap in to the lower back muscles.
4. If you like, you can try hovering the palms off the floor to make sure you are not using them to lift up at all.
Boat Pose (Navasana)
When approached correctly, Boat Pose is one of yoga’s greatest abdominal strengtheners. What we’re interested in here is not whether you can straighten your legs fully. The most important thing is the relationship between your torso and your thighs. You want to maintain a nice sharp V shape there.
So, if you straighten your legs and your V gets low and loose, you should keep your knees bent for now. Introducing dynamic movement into your Boat makes it function more like a crunch.
To do this, lower on an exhalation as if you were going to lie down on the floor, but keep your shoulders and heels hovering above the floor. This is called Low Boat. Then sit back up into Boat in an inhalation. Try moving up and down five to ten times, keeping your toes active the whole time.

Step-by-Step Instructions:
1. Sit with your knees bent, the soles of your feet flat on your mat, and your hands resting lightly on either side of you. This position helps you feel your sit bones, which act as the balancing point for the pose.
2. Lean back a little bit to lift your feet off the floor. Keep your knees bent and bring your shins parallel to the floor. Flare your toes.
3. If it helps you keep your torso up, you can hold on to the backs of your thighs with your hands. If you can maintain a tight V without holding on, let go and bring your arms level with your shoulders. Your palms can be facing each other, turned up, or turned down, whichever feels better.
4. Straighten your legs only if you can maintain the position of your thighs and torso when doing so.
5. Move back and forth between Boat and Low Boat to build more core strength.
Warrior II (Virabhadrasana II)
Warrior II strengthens the legs, core, arms, and back. To get the most strengthening power out of this position, set yourself up with the best possible alignment and then go for a longer hold time, perhaps up to ten breaths.
Your foot alignment, with the front heel lined up with the back arch, makes this a bit of a balance, requiring core strength to steady the wobbles. You will really feel some muscle fatigue in your front thigh when you deepen your front knee enough to bring the thigh parallel to the floor. Holding your arms outstretched also works the biceps and deltoids.

Step-by-Step Instructions:
1. Set up with your right foot at the front of your mat and left foot at the back. Your left foot is tuned out 90 degrees (or slightly less) and the hip points are facing the left side of your mat.
2. Align your front heel and back arch using the Central Line on your Liforme Mat. Bend the right knee so that it comes directly over the right ankle and your thigh is as close to parallel with the floor as possible.
3. Stack your shoulders over your hips and extend your right arm forward and left arm back, parallel to the floor.
4. Your head faces the front of your mat.
5. Take five to ten deep breaths while maintaining your alignment.
6. Then do the same pose with the left foot forward.
Half Moon Pose (Ardha Chandrasana)
Poses in which you stand on one leg are really good strengtheners because they require your body to recruit lots of muscle groups in order to remain balanced upright.
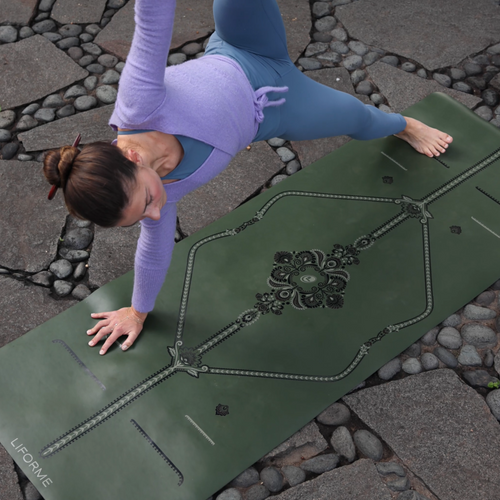
Half Moon Pose works the legs and the core even though one hand is still on the ground. Try to use this hand very lightly so that your core is doing most of the work.
It may be very helpful to use a block under your hand for a little added lift. As you get stronger, you can work on slowly talking all the weight out of your bottom hand. Also, remember to keep your lifted foot engaged by flaring your toes to activate the whole leg.

Step-by-Step Instructions:
1. From Warrior II, place your left hand on your left hip, then lower your right hand to the floor just in front and slightly to the right side of your right foot. At the same time, lift your left foot off the floor.
2. Straighten your right leg, but don’t lock your knee.
3. Flex your left foot and lift your left leg so that it’s roughly parallel to the floor.
4. Open your chest toward the left and lift your left arm straight up toward the ceiling.
5. Turn your head to bring your gaze to the left fingertips once you are stable.
6. After five to ten breaths, do the other side.
Tree Pose (Vrksasana)
Any standing balance works to strengthen the legs, back, and core. Tree Pose is usually the first pose of this type tackled by beginners and has a lot to offer more advanced students too, especially if it’s been a while since you’ve tried it.
The challenge here is to shift all your weight into one leg while maintaining a balanced hip alignment and, of course, not falling over. These types of poses tend to be very tippy at first, and it often does take a bit of precipitous swaying to find the middle, so don’t worry if you do overbalance at first.
Most adults don’t spend much time standing on one leg and it takes a bit of practice to find the knack again.

Step-by-Step Instructions:
1. Stand in Mountain Pose with your feet about hips’ distance apart and your knees slightly soft.
2. Come up on the ball of your left foot, letting your right leg absorb most of the body’s weight.
3. Lift the left foot off the floor. Bend your knee and open your left hip to the left.
4. Place the sole of the left foot on the inside of your right leg. It’s fine to use your hands to place the foot. Go for the thigh if you can or the calf if you have less mobility, but avoid the placing the foot on the side of the knee itself.
5. Take your hands to your hips to feel if one side (usually the standing leg) has jutted out to compensate for the shift in balance. If it has, remember to press your thigh into your foot as much as your foot into your thigh. Draw your hips back into alignment if necessary.
6. Bring your hands to Anjali Mudra at your heart or raise your arms over your head if you are able to.
7. If balance is very difficult, try the pose at a wall. You can put the wall at your back or position yourself so that it catches your knee when it comes out to the side.
8. Repeat the pose standing on the left leg.
Awkward Chair Pose (Utkatasana)
Sit low and long in Chair Pose, and you will feel the proverbial burn in your thighs. This is a pose that is approached slightly differently by various schools of yoga but all have in common the requirement of a deep seat.
When you lift your arms, this also works the shoulders, upper back, and upper arm muscles. In addition to holding a half-squat, your legs must maintain the alignment of the knees so that they neither collapse inward nor splay outward. Chair is often a quick stop in a vinyasa flow but challenge yourself to a longer hold to build strength.

Step-by-Step Instructions:
1. In Chair, you may choose to have the feet touching, a few inches apart, or even hips’ distance apart. What is important is that each knee must stay above its corresponding ankle. In other words, if the feet are together, the knees should be together. If the feet are hips’ distance apart, the knees must be the same. So the first thing to do is to stand up straight with your feet in your desired placement.
2. Bend your knees and let your butt sink back toward the floor as if you were going to sit on a chair.
3. You can go as low as you want, perhaps even bringing the thighs parallel to the floor. A diagonal thigh is also just fine.
4. Lift your chest as you raise your arms overhead. Keep the palms shoulders’ distance apart or bring them to touch.
5. Breath here for five to ten inhalations and exhalations.
Handstand (Adho Mukha Vrksasana)
Handstanding can be intimidating at first, but there is no denying that it’s an incredible strengthener for the arms, the core (that whole balance thing again), and for self-confidence as well.
It’s a pose that doesn’t come easily for most people so offers ample opportunity for the cycle of failure and success that promotes a growth mindset. If you’re just getting started, work on holding poses like Plank and Downward Facing Dog to establish the strength you need to get upside down.
There’s some debate as to whether it’s better to learn this pose using a wall or not. There are ways to build strength with both approaches, as we’ll detail below.

Step-by-Step Instructions
1. Begin in Downward Facing Dog.
2. Walk your feet in until your shoulders are over your wrists.
3. Lift your right leg to a Downward Facing Dog Split position.
4. Bend your left knee and kick up with it.
5. Practice these kicks until you catch some air, which happens when your hips come over your shoulders.
6. Rest and try the other side to keep things balanced.
L-Shaped Handstand at the Wall
1. Sit with your back against a wall and your legs outstretched. Note the position of your heels. That’s where you want to put the heels of your hands when you come to the next step.
2. Now come into a Downward Facing Dog with your heels on the wall and your hands in the place where your feet were in the last step.
3. Step one foot and then the other up onto the wall. You want to get your heels at hip-level so your body makes the shape of an L.
4. Don’t lock your elbows.
5. Stay here for five to ten breath cycles.
6. If you like, practice lifting one leg at a time up to a vertical handstand position.
Yoga Strong
Yoga offers a lot of ways to improve your strength that are adaptable to different levels of practice. At first, just getting through an hour-long class will be enough of a challenge. Once you become more proficient, there are always ways to intensify the asanas so that growth and transformation continue to be possible.


