In yoga’s standing poses, there are two basic hip positions: closed hips and open hips. Understanding the difference and applying it appropriately is an essential, but often neglected, building block for good alignment in each pose. We’re going in deep here, starting with a closer look at the anatomy and vocabulary involved.
Hips Don’t Lie
If you look at an anatomical drawing of the lower body, you won’t find anything labelled ‘the hips’. That’s because what we commonly call the hips are actually comprised of the pelvis, lower spine, and upper leg bones (femurs) as well as all the muscles and connective tissues that hold them together.
What are often called the hip joints are actually where the femurs meet the pelvis. (Hip-replacement surgery is the replacement of this ball (top of the femur) and socket (part of the pelvis) joint.) Yet for the purpose of yoga, we do often talk about the hips. We needn’t banish this word from our instructions, but it is extremely useful to stop and define precisely what the terms we use actually mean.
Let’s start with the pelvis, which is made up of three bones: the ilium, the ischium, and the pubis. As we reach early adulthood, the joints between these bones become fused so that the entire pelvis moves as a single unit.

Practicum: Closed vs. Open Hips
Come to Mountain Pose at the front of your mat with your feet parallel. Stand with your arms akimbo and feel that your two sides are facing forward, level, and even. Reach your fingers down on both sides and touch the bony, protruding part of the front of your pelvis. We call these your hip points (anatomical name: the anterior superior iliac spines). The positions of these hip points is a very important guide because you can touch them to make sure that your hips are doing what you want them to do.
When both hip points are facing forward, this is a closed hip position. If you swing your right elbow forward and your left elbow back as you rotate your pelvis to the left, both hips points are no longer pointing forward. The right hip point has come forward and the left one has gone back. This is the simplest form of what we call an open hip position.
If you go the opposite way and rotate the pelvis to the right, the left hip point comes forward and the right one goes back. Thus the hips can be opened to either the right or the left side. As you might imagine, all this can get a little more complicated when the legs are doing different things. So we’ll take a look at a few scenarios. But first, this very important message:
Hip-Distance Apart
Confusion often arises when we're told to place our feet hip-distance apart. It’s a good cue in some ways because it allows each person to use their own body as a measuring device. It can be a tricky to get right, however, given the lack of clarity around the whole issue of where the hips are.
For the purposes of yoga, what we’re trying to do with this instruction is situate each foot directly under the place where the femur inserts into the pelvis because this is the position of greatest stability. There is some approximation involved since you can’t see the joint itself from the outside, but you can develop a sense of where it is. Where it’s not is with the feet touching or with the feet as wide as the mat. For most people, it’s in the range of three to seven inches of space between the inside edges of the feet.

Test Case: Downward Facing Dog Split
A Down Dog Split is a great pose in which to feel the difference between closed and open hips. Both hip points face forward in Downward Facing Dog, just like in Mountain Pose. To come into the split while keeping the hips in a closed (sometimes also called squared, just to further complicate matters!) position, lift your left leg straight up and back without changing the position of the hip points/pelvis at all. Flex your left foot so that your toes point straight down at the floor. Your leg may not get up super high, but that’s ok.
To transition to an open hip, rotate your pelvis to stack the left hip point over the right one. Your left toes are now facing the left wall and your left instep is parallel to the floor. You can lift your leg a lot higher in the open position, which may be why people use it as the default. Open versus closed should be a conscious decision, however, since the relative height of the leg is of no consequence, being merely a byproduct of the orientation of the pelvis.
Move back and forth between the closed and open position to get a feel for it.
Another standing pose with one leg lifted in the closed position is Warrior III. An example of the open position is Half Moon Pose. Standing Split can go either way, but make it an intentional choice.

Test Case: Warrior I and Warrior II
Ok, now that you’ve tried both positions with a leg up, let’s translate what you’ve experienced into poses with both feet on the floor. We’ll work through Warrior I and II because their alignment often causes a lot of confusion.
Put simply, Warrior I is a closed-hip pose. Warrior II is an open-hip pose.
1. Start at the front of your mat in Mountain Pose.
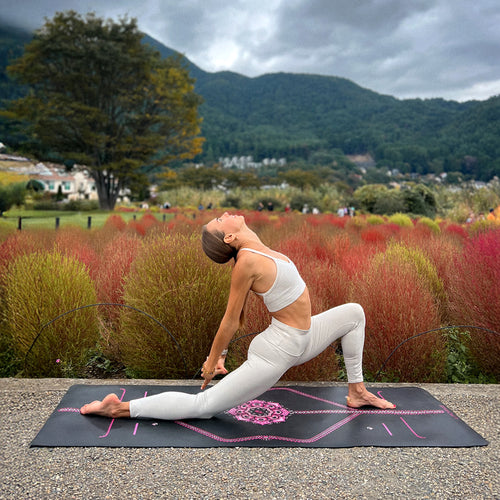
2. Step your left leg toward the back of your mat. Keep it to the left side of the Central Line on your Liforme Mat. Keep your right foot where it is or edge it slightly to the right (away from the Central Line).
3. Turn your left toes out about 45 degrees. Use the 45-Degree lines on your Liforme Mat as a visual guide.
4. Place your hands on your hips points to make sure they are still both pointing towards the front of the room.
5. Bend your right knee over your right ankle. You may need to step your left foot a little further back on your mat to get the correct length between your feet. Once your left foot is in position, ground down through the heels and outer edge of both feet.
6. Maintaining the closed hip position makes more anatomical sense in most bodies if you keep the left foot to the left of the Central Line and the right foot to the right of the Central Line instead of placing both heels on the line.
7. Keep your hands on your hips points as you continue to adjust the right side of your pelvis back and the left side forward in order to maintain that Mountain Pose positioning of the pelvis. Your shoulders stack directly above the pelvis. You may choose to lift your arms up toward the ceiling but it’s not necessary for this exercise.

Ok, now on to Warrior II!
8. The transition to Warrior II is often described in terms of opening the arms out with a flourish. While it’s true that the shoulder girdle stays aligned with the pelvic girdle and also opens to the left, for the purposes of this flow, keep your hands on your hips.
9. Draw your right elbow forward and your left elbow back as you shift the left side of your pelvis toward the back of your mat, just as you did earlier in Mountain Pose. The pelvis and shoulders are now facing the left.
10. Heel-toe your right foot to the Central Line. Adjust your left foot to a 90-degree angle and scoot it toward the centre so that your left instep is intersected by the Central Line.
11. Make sure one hip point is not higher than the other. Make adjustments to level the hips if necessary.
12. Ground through the outer edge of the left foot and move your right knee to the right so that it stays over your ankle rather than sneaking toward the centre.
The poses that often flow from Warrior II (Extended Side Angle, Reverse Warrior, Triangle, Half Moon) also have an open hip position.
Closed hip poses include Pyramid, Revolved Triangle, Revolved Half Moon, and Hanumanasana.
Whenever you come into a standing pose, ask whether it’s intended to be a closed or open hip position. Keep your hips honest for the most stable and aligned poses.