Warrior 2 is one of yoga’s foundation poses, which means that we do it a lot, and its alignment is the basis for many other postures. To fully understand Warrior II, we need to talk about its hip alignment and how it differs from Warrior I.
The short and sweet version is that in Warrior I, your pelvis faces the front of the mat, while in Warrior II, your pelvis faces the side of the mat. If this sounds confusing, check our in-depth guide to hip alignment with hands-on exercises to help you get a feel for it.
Standing poses are built from the ground up, so we’re going to pay particular attention to your foundation, starting with the feet and hips, then moving up to the shoulders, arms, neck, and head. In a class setting, you might not have time to go through each of these steps as meticulously, so it’s a good idea to occasionally take the time on your own to reaffirm the alignment in your body’s muscle memory. Then, when the pose comes up in a flow, you can just drop into it with a series of small self-adjustments.
 Featured Yoga Mat: Black & Gold Yoga Mat
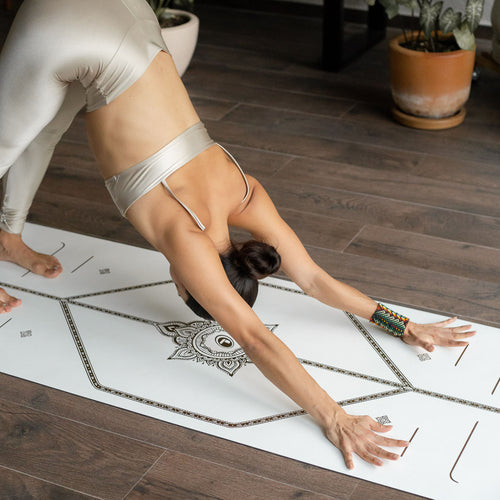
Step-by-Step Instructions for Warrior 2
- From Downward Facing Dog, step your right foot forward to the inside of your right hand. Bend your right knee directly over your right ankle.
- Pivot on the ball of your left foot to lower your heel toward the central line of your mat.
- Turn your back foot so it’s parallel to the back edge of your mat. Some people like to turn their toes in slightly, but make sure that you don’t turn them outwards.
- Position your feet so that your front heel is lined up with your back arch. If you feel unstable with this setup, you can go front heel to back heel instead for a slightly wider base.
- Once you have your feet in position, lift your upper body so that your shoulders come over your hips.
- Point your hip points towards the long edge of your mat, so that your pelvis faces the side wall.
- With your hands on your hips, check your hip position and adjust so that your hip points are level and in the open position. Outwardly rotate both thighs to open the hips.
- Make sure that your right knee stays over the right ankle. Bring your right thigh as close to parallel to the floor as possible, while keeping the left leg very straight.
- Ground into the four corners of each foot. Isometrically draw the feet toward each other to engage the entire leg. Engage your thigh muscles to the bone to make sure both legs stay active.
- Neither flare nor tuck your tailbone. Draw your belly button gently toward your spine.
- Once your lower body is set, lift your arms and bring them parallel to the floor with the right arm forward and the left arm back, palms facing the floor. Like your pelvis, your chest will face the side wall. Activate your hands to keep energy flowing the entire length of your arms. Relax your shoulders away from your ears.
- At this point, there is a tendency for the upper body to angle forward as if the right hand were reaching for something at the front of the room. Make sure to keep your shoulders stacked over your hips, using a mirror if necessary to check your stance.
- Your head faces the front of the room with your gaze following the line your middle finger traces toward the horizon.
- Take about five breaths, making micro adjustments to your alignment if needed, and repeat on the other side.
🧘 Tip from a Yogi
Keep a close eye on your front knee. It tends to want to drift toward the center. Work on keeping your shin perpendicular to the floor with the knee tracking over the middle toe of the front foot.
Warrior 2 Pose Basics
Sanskrit Name: Virabhadra (Hindu Warrior) Asana (Pose)
Yoga Level: Beginner
Pose Type: Standing
Pose Category: Hip Opener
Benefits of Warrior 2
- Strengthens the legs, back, arms, and core.
- Opens the hips, hamstrings, and chest.
- Improves body awareness.
Key Alignment Cues for Warrior 2
1. Knee Over Ankle
Your front knee should track in line with your ankle, not collapse inward. Think of pressing the knee outward, toward your little-toe side.
2. Hips Open to the Side
The pelvis faces the long edge of the mat, which is what separates Warrior 2 from Warrior 1. Keep checking in with your hands on your hips if the position is unfamiliar.
3. Shoulders Over Hips
The upper body tends to tilt forward in this pose. Keep your torso upright and centered over your pelvis.
4. Energize the Back Leg
The back leg is doing just as much work as the front. Keep it active and straight, pressing firmly into the outer edge of your back foot.
Virabhadrasana II Preparatory Poses
 Featured Yoga Mat: Liforme X You
Triangle Pose (Trikonasana)
Shares the same hip-open, side-facing alignment as Warrior 2 and helps you understand how the pelvis and legs relate.

Featured Yoga Mat: Liforme Classic Yoga Mat in Blue
Warrior 1 (Virabhadrasana I)
Understanding Warrior 1's closed-hip alignment makes the open-hip position of Warrior 2 much easier to grasp.
Counter Pose
 Featured Yoga Mat: Radiant Sun in Yellow
Mountain Pose (Tadasana)
Return to stillness in Tadasana between sides to reset your alignment and reconnect with your breath.
Why We Practice Warrior 2
Warrior 2 is a pose that meets you wherever you are. Beginners get a full-body strength challenge and a first real introduction to open-hip alignment, while more experienced practitioners find there's always something to refine - the back leg, the torso, the breath.
Because it shows up in almost every style of yoga, getting comfortable in this pose pays dividends across your whole practice.
Warrior 2 Pose FAQs
What is the difference between Warrior 1 and Warrior 2?
It all comes down to hip alignment. In Warrior 1, your pelvis faces the front of the mat. In Warrior 2, it opens to face the side wall.
How wide should my stance be in Warrior 2?
A good starting point is front heel aligned to back arch. If you feel unstable, widen to heel-to-heel. It should feel powerful, not strained.
How long should I hold Warrior 2?
Five breaths is a solid benchmark, though you can stay longer as your strength and stamina build.
Is Warrior 2 suitable for beginners?
Absolutely. It's one of the first standing poses most beginners learn. Don't worry about getting your front thigh to parallel right away; work within your range, and the alignment will come.
What are the most common mistakes in Warrior 2 pose?
The front knee collapsing inward, the torso tilting forward, and the pelvis not fully rotating to face the side wall are the big three to watch for.