After a workout or run, how quickly do you hit the showers and get on with your day? Though we’re all crunched for time, it’s a good idea to take a few minutes after your sweat sesh for active recovery.
Stretching while you’re warmed up improves your overall flexibility, which helps prevent injuries. So, how about a little gentle yoga before you change out of your leggings?
Post-Workout Yoga Benefits
- Targets multiple muscle groups at once, making it a time-efficient way to recover after exercise.
- Helps your body absorb the effects of your workout and signals the mind to transition back to your day.
- Brings the nervous system back to a resting state after intense exercise. This is particularly useful after HIIT and other high-intensity workouts that spike cortisol levels.
- Stretching while the muscles are still warm improves flexibility more effectively than stretching cold muscles.
- Supports consistent recovery when built into your routine over time.
The 10 Best Yoga Poses for Post-Workout Recovery
 Featured Yoga Mat: Liforme X You
Child’s Pose (Balasana)
Sanskrit Meaning: Bala (Child) Asana (Pose)
Yoga Level: Beginner
Pose Type: Kneeling
Benefits: Stretches your back and hips.
Why This Pose: Begin your recovery with a good old-fashioned break in Child’s Pose to transition into a new movement modality. Take some deep breaths here.
Step-by-Step Instructions:
- Begin on your hands and knees.
- Keeping your arms straight, widen your knees and sink your butt toward your heels.
 Featured Yoga Mat: Liforme Classic Yoga Mat in Terracotta
Cat-Cow Stretch (Marjaryasana-Bitilasana)
Sanskrit Meaning: Marjari (Cat) Asana (Pose) and Bitila (Cow) Asana (Pose)
Also Known As: Chakravakasana
Yoga Level: Beginner
Pose Type: Kneeling
Benefits: Loosens up your back and core muscles.
Why This Pose: Undulations of your spine prevent your back muscles from stiffening up as they cool down. Synchronize your movements with inhalations and exhalations of breath.
Step-by-Step Instructions:
- Come to a hands and knees position.
- On an inhale, drop your belly and lift your head and tail.
- On an exhale, round your spine and tuck your head and tail.
- Keep your navel lightly drawn in throughout.
- Cycle through several rounds of movement and breath.
 Featured Yoga Mat: Liforme Classic Yoga Mat in Purple
Downward Facing Dog (Adho Mukha Svanasana)
Sanskrit Meaning: Adho (Down) Mukha (Face) Svana (Dog) Asana (Pose)
Yoga Level: Beginner
Pose Type: Standing
Benefits: Stretches and strengthens the whole body
Why This Pose: There’s nothing like a full body stretch that also targets the backs of your legs and back muscles.
Step-by-Step Instructions:
- From hands and knees, tuck your toes under and begin to lift your butt toward the ceiling by straightening your legs.
- Push into your palms and let your heel sink toward the floor.
- Let your head hang heavy.
 Featured Yoga Mat: XL Mountain Mat
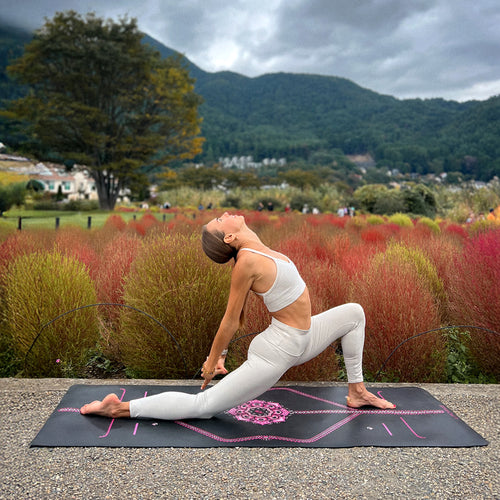
Crescent Lunge Pose (Anjaneyasana)
Sanskrit Meaning: Anjani (Hindu Goddess) Asana (Pose)
Yoga Level: Beginner
Pose Type: Kneeling
Benefits: Stretches the quads, hamstrings, glutes, and hips.
Why This Pose: Getting into your hips, quads, and glutes is especially good after a run.
Props: A Yoga Knee Pad or blanket under your knee makes the pose more comfortable.
Step-by-Step Instructions:
- From Downward Dog, step your right foot to the inside of your right hand.
- Release your left knee to the mat and bend your right knee over your right ankle.
- Lift your arms overhead.
- Play with deepening the bend of your right knee, moving forward and back.
- Repeat on the other side.

Half Lord of the Fishes Pose (Ardha Matsyendrasana)
Sanskrit Meaning: Ardha (Half) Matsyendra (Lord of the Fishes) Asana (Pose)
Also Known As: Seated Spinal Twist
Yoga Level: Beginner
Pose Type: Seated
Benefits: Stretches your back and abdomen muscles.
Why This Pose: This stretch gets into your back, shoulders, and abdominal muscles.
Step-by-Step Instructions:
- From Crescent Lunge with your right foot forward, step your left knee to the outside of your right foot and take a seat.
- Ground down into both sit bones.
- On an exhalation, twist your upper body to the right, bringing your right hand to the floor behind you and your left elbow to the outside of your right knee.
- Lengthen your spine on your inhalations and deepen your twist on your exhalations.
- Repeat on the other side.
 Featured Yoga Mat: Liforme Classic Yoga Mat in Blue
Cow Face Pose (Gomukhasana)
Sanskrit Meaning: Go (Cow) Mukha (Face) Asana (Pose)
Yoga Level: Beginner
Pose Type: Seated
Benefits: Stretches your shoulders, arms, and glutes.
Why This Pose: A great multitasker that targets your shoulders and triceps in the upper body and outer thighs in the lower body.
Step-by-Step Instructions:
- From a cross-legged position, move your right ankle close to your left hip and stack your right knee on top of your left.
- Lift your right arm straight up toward the ceiling and bring your left arm along your left side.
- Bend your right elbow and bring your right hand to the center of your back between your shoulder blades.
- Bend your left elbow and reach your left hand up the center of your back along your spine.
- If your hands meet behind your back, clasp them together. If they don’t meet, you can take a towel or a strap between them.
- Repeat on the other side.
 Featured Yoga Mat: Liforme Classic Yoga Mat in Grey
Cobbler’s Pose (Baddha Konasana)
Sanskrit Meaning: Baddha (Bound) Kona (Angle) Asana (Pose)
Also Known As: Butterfly Pose, Bound Angle Pose
Yoga Level: Beginner
Pose Type: Seated
Benefits: Stretches the hips, groins, shins, and feet.
Why This Pose: Now on to your inner thighs and groin.
Step-by-Step Instructions:
- In a seated position, bend your knees and bring them into your chest with your feet flat on the floor.
- Open your knees to the left and right, bringing the soles of your feet together.
- Stay upright or hinge forward any amount.
- Take some deep breaths here.

Reclining Hand-to-Big-Toe Pose (Supta Padangusthasana)
Sanskrit Meaning: Supta (Reclined) Padangusta (Big Toe) Asana (Pose)
Yoga Level: Beginner
Pose Type: Supine
Benefits: Stretches the hamstrings and calves.
Why This Pose: If you have a strap or towel handy, use that to give your hamstrings a nice stretch. If not, hold anywhere on the leg that is comfortable.
Step-by-Step Instructions:
- Lie down on your back with your legs outstretched.
- Hug your right knee into your chest.
- Loop a strap or towel around your right instep or hold your right foot or leg with your right hand.
- Straighten your right leg, extending the sole of your foot toward the ceiling.
- Make sure your arms stay in their sockets.
- Repeat for both legs.
 Featured Yoga Mat: Liforme Classic Yoga Mat in Green
Eye of the Needle (Sucirandhrasana)
Sanskrit Meaning: Suci (Needle) Randra (Opening) Asana (Pose)
Also Known As: Reclined Pigeon
Yoga Level: Beginner
Pose Type: Supine
Benefits: Opens the hips.
Why This Pose: Stretch your piriformis and glutes.
Step-by-Step Instructions:
- Lie on your back with both knees bent and pointing at the ceiling.
- Hug your right knee into your chest.
- Place your right ankle on the top of your left thigh with your right knee pointed toward the right.
- Lift your left foot away from the floor and take hold of the back of your left thigh.
- Flex both feet and draw your left thigh closer to your abdomen.
- Repeat on the other side.
 Featured Yoga Mat: Mindful Garden in Olive
Corpse Pose (Savasana)
Sanskrit Meaning: Sava (Corpse) Asana (Pose)
Yoga Level: Beginner
Pose Type: Supine
Benefits: Rests the body
Why This Pose: It wouldn’t be yoga without a little Savasana. If you can take even 2 minutes to lie still, it’s better than nothing!
Step-by-Step Instructions:
- Lie down on your back with your eyes closed, legs outstretched, and arms along your sides.
- Turn your palms to face upwards and let your feet open out to either side.
- Release any controlled breathing and let your inhalations and exhalations occur naturally.
- Stay here for several minutes.
Tips for Incorporating Yoga into Your Post-Workout Routine
- Allow for your recovery time when planning your workout.
- You can get a lot of stretching done in just 10 minutes.
- Keep a strap or towel nearby. It makes poses like Reclining Hand-to-Big-Toe and Cow Face Arms much more accessible.
- You don’t have to do every pose every time. Mix it up.
- To reap all of yoga’s rewards, plan longer yoga sessions into your weekly movement routine.
A Little Yoga Goes a Long Way
When it comes to active recovery, and yoga for that matter, a little is better than none. What really counts is consistent practice over time. Build stretching into your routine, and you’ll soon experience yoga’s amazing benefits for yourself.
Post-Workout Yoga Stretches FAQs
Are post-workout stretches necessary?
They make a real difference. Post-workout stretches help release muscular tension, improve circulation, and bring the nervous system back to a resting state. Stretching while the muscles are warm is also more effective for building flexibility than stretching cold muscles.
How long should I do yoga after a workout?
Even 10 minutes makes a meaningful difference. A few well-chosen poses targeting the muscles you've worked is enough to support recovery.
Should I do yoga before or after exercise?
For recovery and flexibility purposes, after is better. Post-workout, your muscles are warm and more responsive to stretching. Yoga before a workout is better suited to gentle mobilization rather than deep stretching.
Can I do these poses after any type of workout?
Yes! The sequence works well after running, strength training, cycling, or HIIT. You may want to prioritise different poses depending on what you've worked: Crescent Lunge and Eye of the Needle after leg-heavy sessions, Cow Face and Cat-Cow after upper-body or back work.